- Your insurance policy typically requires you to stop further damage (mitigation), but making permanent repairs before an inspection can jeopardize your coverage.
- Before paying a crew for emergency fixes, you must get clarity on specific limits, permission boundaries, and receipt requirements from your claims representative.
- Never throw away the broken parts that caused the damage (like a split pipe or a failed valve). The adjuster needs to inspect the physical cause of the loss.
- Do not sign open-ended “Assignment of Benefits” contracts under pressure. Always maintain control of your claim.
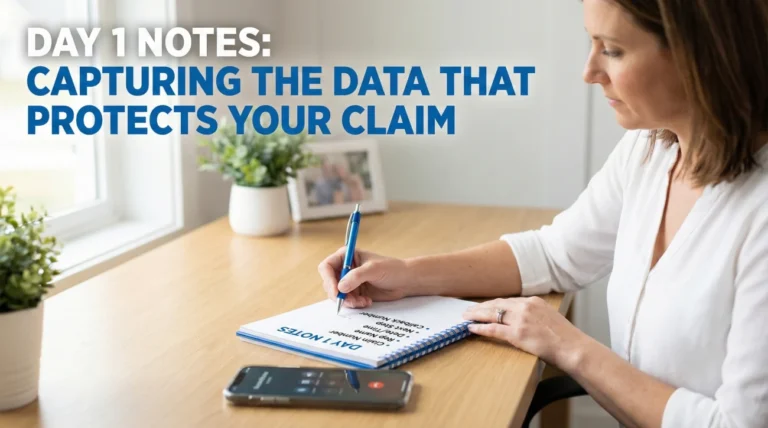
- Log every emergency repair decision in your intake notes, including who authorized it and what instructions they provided.
The Line Between Stopping Damage and Fixing It
When water is pouring through your ceiling or a tree is resting on your roof, waiting days for an insurance adjuster to arrive feels impossible. Your immediate instinct is to call someone to fix the problem right now. However, stepping over the line from “emergency stabilization” to “permanent repair” before the insurance company assesses the site is a massive operational risk.
In claims operations, I frequently audit files where property owners accidentally compromised their own coverage simply because they were trying to be proactive. They hired a crew to completely replace a damaged section of drywall or install new plumbing fixtures before the adjuster even saw the damage. When the adjuster finally arrives, the original scene is gone.
You have a general duty to protect your property from further damage. This is often called mitigation. While rules vary by policy and state, tarping a roof, extracting standing water, and shutting off the main water valve are practical mitigation steps. Installing new shingles, putting down new flooring, or completely replacing the plumbing system are permanent repairs. You must understand this boundary on Day 1.
Mitigation You Can Do Immediately (The Safe List)

If you are waiting for a callback from your insurance company, you can usually take these safe, standard steps to stabilize the property without risking your coverage:
- Shut off the water: Stop the flow at the main valve or the fixture.
- Extract standing water: Use a wet vac or call a mitigation crew to pump out water.
- Tarp the roof: Cover exposed areas to prevent rain from entering.
- Board up broken windows or doors: Secure the property against weather and theft.
- Move belongings: Relocate furniture and electronics away from the damage zone to prevent secondary damage.
- Document before and after: Take clear photos and videos before you move anything, and again after the stabilization is done.
Key Point: You are expected to stop the bleeding, but you should not perform the surgery until the insurance company has reviewed the chart. Always mitigate, but pause permanent repairs until you have clearance.
The Three Confirmations You Need Before Hiring a Crew

If you need to hire an emergency mitigation crew (like a water extraction company or an emergency roofer), you should not guess what the insurance company will cover. You need to gather specific facts during your initial claim intake call.
Before you sign a work authorization with a contractor, you need to establish a clear understanding of the rules by confirming three specific details with your claims representative.
- ✅ Confirmation 1: Expense Limits. Are there specific monetary caps on emergency services in your policy? In some cases, policies have a strict sub-limit for things like tarping or temporary board-ups.
- ✅ Confirmation 2: Preferred Vendors. Does the insurer require you to use a vendor from their approved network for the work to be fully covered, or are you free to hire an independent local contractor?
- ✅ Confirmation 3: Documentation Requirements. What specific details must the contractor include on their invoice for the emergency work to be considered for reimbursement?
Preferred Vendor vs. Independent Contractor
During intake, the representative might ask if you want to use their preferred vendor for emergency dry-out or tarping. There is a trade-off here. A preferred vendor insurance claim usually moves faster because the insurer already trusts the pricing and process, but using your own independent contractor gives you more direct control over who is in your home. Whichever route you choose, always confirm in writing that the chosen crew is authorized to begin emergency work.
The Pre-Repair Confirmation Script
When you are on the phone reporting your claim, or when sending your first portal message, use this framework to get these confirmations on the record. This ensures you are not operating on assumptions.
First, are there any specific monetary caps or limits on emergency dry-out services in my policy?
Second, am I permitted to use an independent local contractor, or do you require me to use a specific vendor from your network?
Third, what specific details do you need on the emergency invoice to process the reimbursement?”
By asking these questions directly during intake, you establish boundaries. If the representative tells you that you can use any contractor, log that answer immediately. If they tell you there is a $3,000 cap on emergency services, you now know exactly how to manage your contractor.
Field Note: The Discarded Evidence Trap
Let me share a scenario that happens constantly in claims processing. A homeowner has a pipe burst under their kitchen sink. They do the right thing: they call a 24-hour plumber to stop the leak. The plumber cuts out the split section of the pipe, installs a new valve, tosses the broken pipe into their truck, and drives away.
A week later, the insurance adjuster arrives to inspect the water damage. The adjuster asks to see the broken pipe. The homeowner explains that the plumber threw it away. The adjuster then notes in the file that they cannot verify the “cause of loss” because the physical evidence was destroyed prior to inspection.
This situation is often referred to as “spoliation of evidence,” and it is a massive roadblock. Even without bad intent, discarding parts can create a verification gap. The insurance company needs to see the failed component to determine if the break was sudden (which is typically covered) or the result of long-term neglect (which is often excluded).
⚠️ Warning: If a contractor or plumber performs an emergency fix, you must instruct them to leave all broken or failed parts at your property. Place the broken pipe, the failed supply line, or the cracked fitting in a bucket and leave it exactly where the adjuster can find it.
When You Must Move Fast: How to Preserve the Scene
Sometimes you have no choice but to tear into a wall to find a massive leak or remove a hazard. If you must act immediately before the adjuster arrives, follow this sequence to protect your claim:
- Capture the “Before”: Take wide-angle video and photos of the damage exactly as you found it.
- Capture the “During”: Take photos of the contractor exposing the leak or removing the hazard.
- Bag the evidence: Place the broken pipe, valve, or fitting in a plastic bag or bucket and label it with the date.
- Keep the invoice: Ensure the plumber documents exactly what they cut out and why.
The Emergency Repair Receipt Checklist
If you pay a contractor to board up a window or extract water, a handwritten note that says “Fix window – $500” is poor documentation. To process your emergency repair reimbursement smoothly, make sure the contractor’s invoice includes the following details before you pay them:
- ✅ Date and Address: The exact date of service and the property location.
- ✅ Scope of Work: A clear note stating the work was temporary or emergency mitigation.
- ✅ Labor Hours: A breakdown of how many people worked and for how long.
- ✅ Materials Used: A specific list of materials (e.g., 2 tarps, 4 sheets of plywood).
- ✅ Photo Reference: A note indicating that the contractor took their own pre-work photos.
- ✅ Contractor Details: Their license number, company name, and phone number.
What to Log: The Emergency Repair Intake Fields
As you manage these immediate fixes, your intake file needs to reflect the decisions you are making. Do not rely on your memory. In the chaos of Day 1, details blur quickly.
Open your claim communication log and ensure you have dedicated fields for emergency actions. This creates a clean, verifiable timeline that you can hand to the adjuster later as part of your proof of loss playbook.
| Log Field | What You Should Record |
|---|---|
| Authorization Given By | The name and ID number of the claims representative who confirmed your emergency limits and vendor rules. |
| Contractor Name & Role | Who you hired and exactly what they were hired to do (e.g., “ABC Restoration – Water extraction only, no demolition”). |
| Instructions Given to Crew | A note confirming you told the crew to save broken parts and stop before doing permanent repairs. |
| Invoice Status | Whether the crew provided a detailed, itemized receipt or if you are waiting for it to be emailed. |
Common Mistakes When Managing Immediate Repairs
The urgency of a damaged home makes people vulnerable to administrative mistakes. Knowing what to avoid on the first day is just as important as knowing what to do.
Mistake 1: Signing an open-ended contract.
Emergency mitigation crews often present a document called an “Assignment of Benefits” (AOB) or a broad authorization form. Not all AOBs are the same, and rules vary heavily by state, but signing one typically transfers your right to the claim money directly to the contractor, meaning they negotiate directly with the insurer without your input. I always advise property owners to read carefully. You generally want to sign a work authorization for specific emergency services, not a total assignment of your claim rights.
Mistake 2: Paying in cash without a detailed receipt.
If you do not force the contractor to follow the emergency repair receipt checklist outlined above, you will struggle to prove what the money was actually spent on. Vague receipts are routinely heavily scrutinized or rejected.
Mistake 3: Throwing away the damaged item.
As mentioned in the field note, throwing away the broken parts that caused the damage creates a gap in the facts. Hold onto everything until the desk adjuster formally clears you to dispose of the debris.
Final Takeaway
Handling emergency repairs before the adjuster arrives is a balancing act. You must take practical steps to stop further damage, but you cannot alter the scene so much that the insurance company cannot verify the cause or the extent of the loss.
By asking the right questions during your intake call, logging the boundaries provided by your claims representative, and retaining the physical broken parts, you create a safe environment for your claim. Focus strictly on stabilization, get itemized receipts for the temporary work, and pause any permanent remodeling until you have an official, documented green light.
❓ FAQ
🛑 Can I fix my roof before the insurance adjuster comes?
You can and should install a temporary tarp to prevent further rain from entering your home. However, you should not install permanent new shingles or rebuild the structure until the adjuster has inspected the original damage.
📞 Do I need permission from insurance to stop a leak?
You do not need permission to shut off your water main or stop an active leak. Policies generally require you to mitigate further damage immediately. However, you should confirm your coverage limits before paying a large crew for extensive dry-out services.
🛠️ What happens if I throw away the broken pipe?
Throwing away the failed part can cause major delays or even a denial. The adjuster needs to inspect the physical item to determine the exact cause of the loss. Always instruct plumbers to leave broken parts at your home.
💸 Will insurance reimburse me for emergency repairs?
In most cases, reasonable expenses incurred to protect the property from further damage are reimbursable. You must save detailed, itemized receipts from the contractors who perform the temporary fixes.
📝 What if the contractor wants me to sign an AOB to start work?
Read it very carefully. An Assignment of Benefits (AOB) transfers your claim rights to the contractor. You generally want to sign a work authorization limited strictly to emergency services, rather than signing over the entire claim to a vendor.
🏗️ Can I remove wet drywall before the adjuster comes?
You can remove wet drywall if it is actively causing a health hazard or structural issue, but you must heavily document it first. Take extensive photos and videos of the damage, and keep a piece of the damaged material for the adjuster to inspect.
🚿 Can a water mitigation company start work immediately?
Yes, water extraction is time-sensitive. However, it is a smart administrative habit to call your insurance company first to confirm if there are any monetary caps on dry-out services before authorizing the crew to begin.
📄 What should an emergency repair receipt include?
A proper receipt should include the contractor’s name and contact info, your property address, the date of service, a breakdown of labor hours, and an itemized list of materials used for the temporary fix.
🤔 What is the difference between mitigation and a repair?
Mitigation is a temporary action taken to stop the bleeding, such as extracting water or boarding a window. A repair is a permanent fix intended to restore the property to its original condition, such as installing new glass or laying new carpet.
🔍 Will my insurance company send their own emergency crew?
Many insurance companies have a network of preferred vendors they can dispatch for emergencies. You should ask during your initial claim call if they recommend a specific crew or if you are free to hire a local independent contractor.
⚠️ Disclaimer: PropertyClaimChecklist.com provides practical guidance, process checklists, and example follow-ups to help you organize a property claim and move it forward. It is not policy language, claim documentation, legal content, or a substitute for your insurer's instructions. Always rely on your carrier's requirements and your actual policy terms for what must be submitted and how decisions are made.