- Quality beats volume: Uploading 50 loose photos often slows down the process. We focus on a clean “evidence pack” strategy.
- The Core Three: Every claim requires proof of ownership, proof of the event date, and a preliminary scope of damages.
- Format matters: Adjusters need PDF files for documents and clear JPEG files for photos. Never send mobile screenshots of paperwork.
- Proof of submission: Sending is not enough. You must confirm receipt in writing to keep the timeline moving.
Why Your Initial Document Packet Determines Claim Speed
The moment you file a claim, a clock starts ticking. But contrary to popular belief, the speed of your claim isn’t just about how fast the adjuster works. It is often determined by the clarity of the documents needed for homeowners insurance claim submission that you provide in the first 48 hours.
In my experience handling claims operations, I have seen a clear pattern. Claims that arrive as a disorganized dump of receipts and blurry photos tend to drag on for weeks. Claims that arrive as a structured “evidence pack” tend to move through the initial review steps much faster.
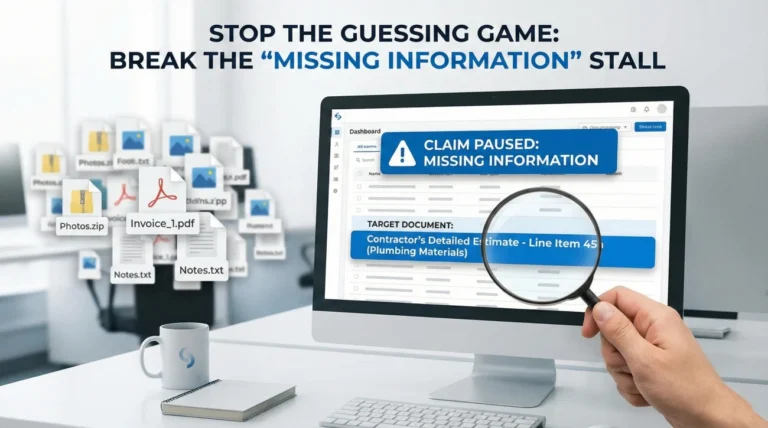
I recall one specific case involving a kitchen fire where the homeowner uploaded 40 detailed photos of burnt cabinets but forgot the official fire report. The file sat untouched in the “pending verification” queue for 12 days simply because the system flagged the incident date as unverified. Once we guided them to upload that single PDF report, the claim was assigned to a field adjuster in under 24 hours.
This guide is not legal advice. It is an operational checklist to help you gather the exact paperwork your insurance company needs to move your file from “New” to “In Progress” without unnecessary delays.
The “Attach vs Keep” Strategy to Avoid Overload

Before gathering papers, we need to establish a rule that will save your sanity: The Attach vs Keep Rule.
A common mistake is thinking you must send every single scrap of paper immediately. When you upload 200 individual files to a portal without context, you force the adjuster to spend their limited time sorting your administrative mess rather than evaluating your damages.
Key Point: Your goal is to make the adjuster’s job easy. An easy file gets worked on first. A messy file gets pushed to the bottom of the stack.
We divide your documents into two piles:
- 📤 Attach: Evidence that proves ownership, the incident date, and the immediate visual damage. These go to the insurer now.
- 📂 Keep: Detailed backup records, manuals, older receipts, and duplicate photos. These stay in your organized claim folder until requested.
Category 1: The Gatekeeper Documents (Proof of Ownership)

The first thing an adjuster must verify is that you actually own the property and have the right to file a claim. If this isn’t clear, they cannot release any funds, no matter how bad the damage looks.
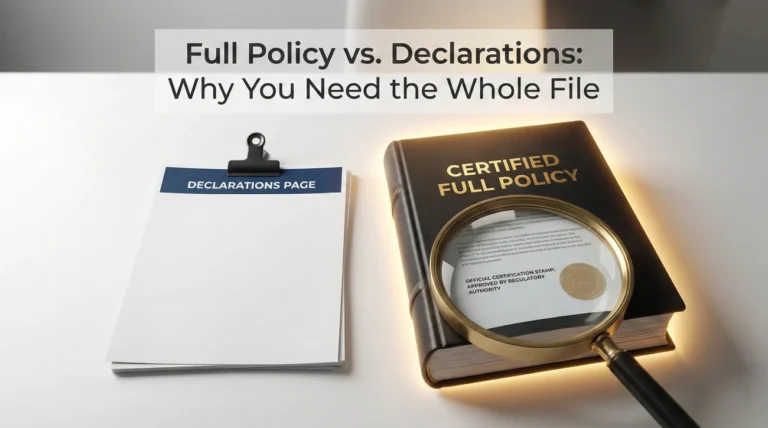
The Property Deed or Current Tax Record
While the insurer likely has this on file from when you bought the policy, providing a current copy removes a verification step for them. A property tax bill from the current year is often sufficient.
- 📄 Format: PDF scan.
- 🎯 Why it matters: Verifies the names on the title match the names on the policy.
Mortgage Statement Information
If you have a mortgage, your lender is likely a “co-payee” on large settlement checks. The adjuster needs to know exactly who holds the loan to draft the check correctly.
| Document | What to Verify |
|---|---|
| Latest Mortgage Statement | Ensure it shows the loan number and the mailing address for the “Loss Draft” department. |
| HOA Statement (if applicable) | Shows you are current on dues. This can sometimes impact master policy coordination in condos. |
Category 2: Validating the Incident Date and Cause

Insurance policies cover specific events that happen within the policy period. You must prove when the damage happened and what caused it.
I often see claims stall here because the homeowner is vague. Saying “it happened sometime last week” can trigger a coverage investigation. You need independent documents that pin down the date.
Third-Party Incident Reports
Independent verification is gold in claims operations. It shows the adjuster that the event is a fact rather than an opinion.
- 📄 Police Report: Essential for theft, vandalism, or vehicle impact.
- 📄 Fire Report: Required for almost any fire claim.
- 📄 Weather Reports: If claiming wind or hail, a PDF printout of a local weather report for that specific date helps validating the cause.
Initial Scene Context Photos
At this stage, you don’t need macro shots of every scratch. You need wide shots that show the context of the loss.
- 📸 Front of house (shows address/location).
- 📸 The specific room or area damaged.
- 📸 The source of the damage (like the burst pipe or the hole in the roof).
Category 3: The Preliminary Scope of Damages

For a standard homeowners claim, you do not need a final inventory on Day 1. However, you do need to alert them that personal property was damaged so they set the “reserve” correctly. The reserve is the estimated savings account they set aside for your claim.
Create a simple “Scope of Loss” summary document. Do not rely on the adjuster to find damages by scrolling through your photos.
Example: Preliminary Scope Summary (PDF)
Room: Living Room
– Drywall ceiling collapsed (approx 4×4 area)
– Hardwood floor water damaged (approx 100 sq ft)
– Sofa soaked (total loss)
– TV water damaged (unsure if functional)
Field Note: The “Drip-Feed” Trap
One of the most common operational bottlenecks is the “Drip-Feed.” This happens when a homeowner sends one document on Tuesday, two photos on Wednesday, a receipt on Thursday, and a question on Friday.
From the other side of the desk, this creates chaos. Each email might get assigned to the file, but the adjuster might not review the file until they see a “complete update.” By drip-feeding, you are constantly resetting your place in the review queue.
Key Point: Batch your work. Collect the core documents needed for homeowners insurance claim processing into one well-organized email or portal upload. It allows the adjuster to review everything in one sitting.
A File Naming Convention That Prevents Confusion
Never send files named “IMG_0983.JPG” or “Scan001.pdf.” The adjuster has to rename them to save them into their system. This adds friction. Rename your files before sending to look professional.
Format: [Your Last Name] - [Claim Number] - [Content]
- 📄 Smith – Claim 12345 – Property Deed.pdf
- 📄 Smith – Claim 12345 – Police Report.pdf
- 📸 Smith – Claim 12345 – Kitchen Damage Wide.jpg
The Submission Email Script
Whether you are using a portal or email, your message should be a clean cover letter. Do not write your life story in the body of the email. Put the details in the attached documents.
Subject: New Document Submission – Claim #[Your Claim Number] – [Your Last Name]
Hello [Adjuster Name],
Please find the attached initial document packet for the claim referenced above.
Attached you will find:
1. Proof of Ownership (Deed)
2. Incident Report (Police Report #555-0199)
3. Preliminary Scope of Damages Summary
4. Photos of the origin of loss
Please review these documents and let me know in writing if any further documentation is required to move the claim to the inspection phase.
Please reply to confirm receipt of this packet.
Regards,
[Your Name]
[Your Phone Number]
Three Formatting Mistakes That Cause Automatic Rejection

Even with the right documents, format issues can cause delays. Here are the rejections I see most often in the system.
1. The Mobile Screenshot of a Document
Do not take a screenshot of a PDF on your phone and send the image. It ruins the resolution and makes text unreadable when printed.
If you have a PDF like a bank statement, send the actual PDF file. If you have a physical paper, use a scanning app like Adobe Scan or Notes on iPhone to convert it to a flat and clear PDF. Do not just take a photo of the paper on your lap.
2. Cloud Links Instead of Attachments
Many insurance company firewalls block Google Drive, Dropbox, or iCloud links for security reasons. If you send a link saying “Click here to see my photos,” there is a high chance the adjuster cannot open it. Always attach the actual files unless the file size is massive.
3. Live Excel or Word Documents
Unless specifically asked for a spreadsheet, convert your lists to PDF before sending. This ensures the formatting stays exactly how you intended and prevents accidental edits by the adjuster.
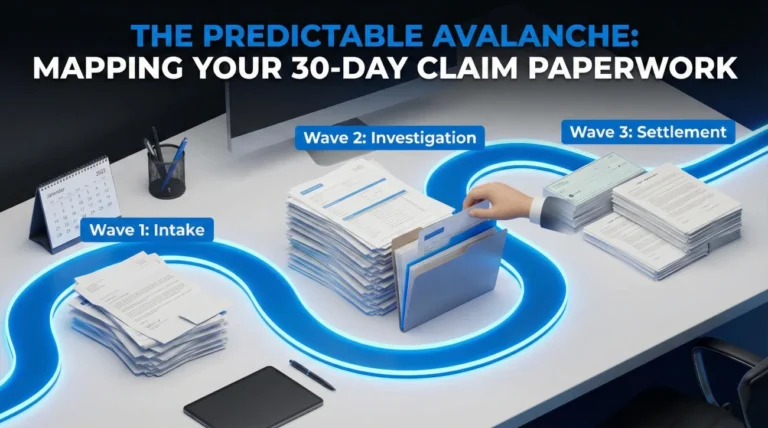
What Happens After You Send This Packet?
Once you submit this baseline packet, you have shifted the ball to their court. By providing proof of ownership, proof of the event, and a rough scope of damage, you have removed the most common excuses for delay.
The next phase usually involves the physical inspection and the drafting of the estimate. This transitions your file from “intake” to “investigation,” which requires a different set of tracking protocols found in our Property Insurance Claim Documents Checklist. For now, however, your priority is simply ensuring this initial packet is received and logged correctly.
Remember to log exactly when you sent this packet. Save the “Sent” email or take a screenshot of the “Upload Successful” screen on the portal. This is your proof that you complied with your duties.
Final Thoughts on Document Hygiene
Gathering documents for a homeowners claim feels overwhelming because it usually happens when you are already dealing with a disaster. It is normal to feel scattered. But remember that you do not need to build the entire case on Day 1.
Start with the basics. Who owns it? When did it break? What does it look like? If you can answer those three questions with clean and clear PDFs, you are already ahead of 90% of claims. Take a breath, scan your docs, name them clearly, and hit send.
❓ FAQ
📋 What papers do I actually need to start my claim?
You generally need your policy number, a proof of ownership document (like a deed or tax bill), a police or incident report if applicable, and clear wide-shot photos of the damage. You typically do not need a full contractor estimate just to open the file.
🧾 Can I just send pictures of my receipts?
It is risky because photos of receipts are often blurry or cut off. It is much better to use a free scanning app on your phone to convert those receipts into a single, flat PDF file before emailing them.
⏳ Do I have to wait for an estimate to file?
No. You can and should file the claim based on your own knowledge of the damage. Waiting for a contractor estimate might delay yournotice of loss” filing, which can cause coverage issues.
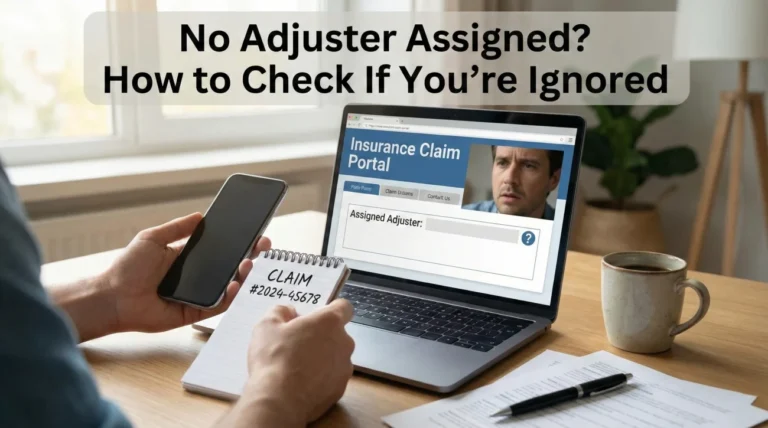
📨 How do I prove they got my documents?
Never assume they received it. Always ask for aread receipt” in your email client and include a specific line in your email body asking them toPlease reply to confirm receipt of these documents.” If they don’t reply in 48 hours, call to confirm.
🏠 What if I can’t find the deed to my house?
Don’t panic. You can usually get a copy from your county recorder’s website or your local tax assessor’s office. Often, a current property tax bill is enough to prove ownership for the initial claim stages.
📄 What documentation do I need to file a property insurance claim?
Start with photos or video of the damage, a simple list of damaged items, and any receipts you already have. Add repair estimates only if your insurer requests them.
📸 Should I take photos or video before I start cleaning up?
Yes. Capture the condition first if it’s safe. Once cleanup or demolition starts, you can’t recreate the “before” evidence.
🗑️ Do I have to keep damaged items for the adjuster to see?
In many cases, yes. Don’t throw items away until the adjuster has had a chance to review or your insurer tells you it’s okay.
🧰 Can I make temporary repairs before the adjuster comes?
Usually yes. Preventing more damage is expected. Document before and after, and keep receipts for anything you buy or hire.
📞 What information will they ask for when I report a home insurance claim?
Expect basics like policy info, contact details, type and date of loss, and a short description of what happened.
📎 Do I need my policy number to start a claim?
It helps, but many carriers can still find your policy using your address and identity details. If you have the number, include it to reduce back-and-forth.
🧾 Do I need receipts to prove what I own?
Receipts help, but they’re not the only proof. Photos, videos, manuals, credit card statements, and a clear item list can support ownership.
📤 Why does my claim slow down after I upload documents?
Most delays happen when the file is incomplete or hard to review. A clean, labeled packet is easier to verify than dozens of loose uploads.
🗂️ Should I send one PDF or lots of separate files?
Fewer, well-labeled PDFs are usually easier to review than many tiny files. Keep photos as original image files, and keep paperwork as PDFs.
📨 How do I prove the insurance company received my documents?
Save the portal confirmation screen or the sent email, and ask for written confirmation. If you don’t get it, call and request a receipt note on the claim file.
🌧️ Do I need proof of the storm date for my claim?
It can help, especially for storm events. A third-party weather report for your area on the loss date can support the timeline.
🏠 What should I photograph first for a homeowners insurance claim?
Start wide: exterior, the room context, then the source of damage if visible, then close-ups for detail. The goal is context plus proof.
⚠️ Disclaimer: PropertyClaimChecklist.com provides practical guidance, process checklists, and example follow-ups to help you organize a property claim and move it forward. It is not policy language, claim documentation, legal content, or a substitute for your insurer's instructions. Always rely on your carrier's requirements and your actual policy terms for what must be submitted and how decisions are made.