- The Goal: Turn a chaotic list of items into a navigable map for your adjuster.
- The Method: Create a “Cover Sheet” or “Master Index” that links every item to its specific photo and receipt file.
- The Result: Faster review times because you remove the guesswork of “which receipt goes with which sofa.”
The Difference Between a Dump and a Submission
If you have ever handed a stack of unorganized papers to someone and watched their eyes glaze over, you already understand why an inventory index for insurance claim documentation is vital. In my years of claims operations, I see two distinct types of submissions land on my desk. The first is what we call the “Data Dump.” This is usually a zip file containing 400 unnamed photos, fifty random PDF receipts, and a loose list of damaged items pasted into the body of an email. These files can sit in the review queue for weeks simply because they require hours of manual sorting to make sense of.
The second type is the “Mapped Submission.” This file gets opened, understood, and processed much faster. Why? Because the policyholder provided a map. They didn’t just say they lost a blender; they pointed exactly to where the blender is listed, which photo proves it exists, and which PDF contains the receipt. When I see a mapped submission, I know the policyholder is serious, and I can usually clear their file significantly faster.
We are not here to discuss valuation or negotiate prices. This is strictly about the operational documentation: creating a summary cover sheet that links your physical losses to your digital proof. This is how you stop your claim from drifting into the “I will get to it later” pile.
The “Linkage” Problem in Property Claims

The biggest friction point in contents claims isn’t usually that the adjuster doesn’t believe you owned a couch. It is that they cannot quickly verify the specifics of that couch among the hundreds of other items you are claiming. When I open a file, I am looking to answer three questions for every single line item immediately:
- ✅ Existence: Did they own it? (Requires a photo or affidavit).
- ✅ Ownership/Value: How much was it? (Requires a receipt or bank statement).
- ✅ Condition: Was it damaged by this event? (Requires a damage photo).
If you have 50 items, that is roughly 150 mental connections the adjuster has to make. If you have 200 items, the mental load jumps to 600 connections. If you make me hunt for those connections, the process slows down. An inventory index solves this by drawing the lines for me.
Key Point: Do not rely on the adjuster to match “IMG_4402.jpg” to “Living Room Rug” on your spreadsheet. You must make that link explicit in your index.
Operational Field Note: The “Floating Receipt” Issue
I recall reviewing a file where a policyholder submitted excellent receipts. They had clear PDFs for high-end electronics, furniture, and clothing. However, they submitted them as a single 60-page PDF named “Scanned_Docs.pdf” and a separate Excel sheet with just a list of items.
There was no cross-reference. I had to scroll through the 60-page PDF to find the receipt for a specific television listed on row 14 of the Excel sheet. It took me nearly 20 minutes just to verify five items. If that claim had an inventory index, a simple column saying “See Page 12 of Scanned_Docs”, that review would have taken three minutes. Multiply that friction by every item in your house, and you can see why timelines slip.
Core Structure of an Inventory Index

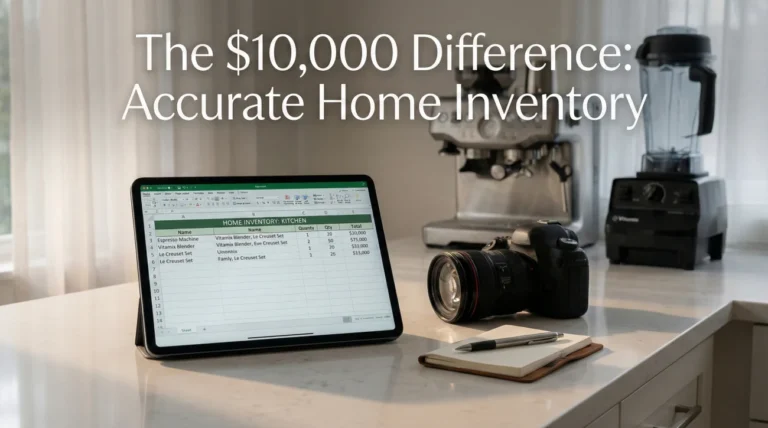
Your inventory index (or cover sheet) is essentially a spreadsheet. While you might write your initial notes on paper, the final submission should be digital so it can be searched and copied. This document is the “brain” of your property claim evidence pack.
Here are the non-negotiable columns you need to create a functional map for your claim.
1. The Tracking ID (The Anchor)
Every item needs a unique number. This seems bureaucratic, but it is the only way to communicate clearly about specific items later. If you just list “Lamp,” and you have four lamps, I guarantee confusion will happen during the review.
Format: Use a simple numbering system like ID-001, ID-002, or LR-01 (Living Room 01).
2. Item Description (The What)
Be specific but brief. This matches the item to the policy coverage.
❌ Bad: “TV”
✅ Good: “Sony 65-inch 4K OLED TV – Model A80J”
3. Age and Condition (The Context)
These two columns determine how depreciation is calculated. If you leave them blank, the system often defaults to “Average” or “Old,” which might not reflect reality.
4. The “Proof of Ownership” Link (Crucial)
This is where the magic happens. In this column, you list the exact filename of the receipt, manual, or bank statement that proves you own it.
Entry Example: `Receipt_BestBuy_2021.pdf (Page 3)`
5. The “Proof of Damage” Link (Crucial)
In this column, you list the photo filenames that show the item is destroyed.
Entry Example: `Photo_LR_TV_Damage_01.jpg`
| ID | Description | Age | Receipt Link | Photo Link |
|---|---|---|---|---|
| LR-01 | Sony 65″ OLED A80J | 2 Years | Receipt_04.pdf | Img_Dam_44.jpg |
| LR-02 | Leather Sectional | 4 Years | Invoice_WestElm.pdf | Img_Dam_45.jpg |
| LR-03 | Wool Rug 8×10 | 1 Year | CreditCardStmt_Nov22.pdf | Img_Dam_50.jpg |
The “Minimum Viable Index” (For When You Are Overwhelmed)
Sometimes you do not have the energy to build a perfect spreadsheet with 20 columns. I get it. If you are burned out, strip it down to the absolute essentials. You can always add detail later, but you need to get the claim moving.
A “Minimum Viable Index” (MVI) only needs these 5 columns to be accepted by most operations teams:
- 1️⃣ ID: Just a number.
- 2️⃣ Description: What is it?
- 3️⃣ Room: Where was it?
- 4️⃣ Photo Link: Prove it is damaged.
- 5️⃣ Proof Method: Receipt, Photo, or Affidavit?
Submit this version first. It is “substantial enough” to open the coverage discussion. Do not let the pursuit of a perfect spreadsheet stop you from submitting a good one.
How to Build Your Index Without Going Crazy
Trying to build this perfectly from scratch in one sitting is a recipe for burnout. In my experience, the most successful policyholders build their index in layers. They don’t try to find the receipt, the photo, and the serial number all at once. They treat it like an assembly line.
Layer 1: The Physical Walkthrough
Forget the receipts for a moment. Just walk through the house (or look at your “Total Loss” photos) and fill in the Description and ID columns. Get the list of items down first. Do not stop to look for a receipt. Just list the items.
💡 Pro Tip: Group items by room. It is much easier for a reviewer to process “Living Room” then “Kitchen” rather than a random mix of items.
Layer 2: The Photo Match
Once your list exists, open your damage photo folder on your computer. Go down your list and find the photo that matches item #001. Rename that photo to match the item (e.g., `Item_001_TV_Damage.jpg`) or just copy the existing filename into your spreadsheet column. This locks in the visual evidence.
Layer 3: The Paperwork Hunt
This is the hardest layer. Now you go through your digital receipts, emails, and paper scans. When you find the receipt for the TV, name the file clearly and paste that filename into the “Receipt Link” column. If you cannot find a receipt, mark that column “Affidavit” or “Photo Proof Only.”
A folder with 200 items called “Image1.jpg” through “Image200.jpg” and a box of receipts.
A spreadsheet where Row 5 says “Coffee Maker,” points to “Photo_Kitchen_05.jpg,” and references “Receipt_Amazon_2022.pdf.”
Index to Zip Folder Map

Your spreadsheet is only half the battle. The other half is the digital folder you send with it. If your spreadsheet points to `LivingRoom_TV.jpg`, but your folder is full of random filenames like `DSC_00991.jpg`, the map is broken.
Structure your digital upload to match your index structure. Here is a structure that always gets a thumbs up from review teams:
    /Main_Claim_Folder
    ├── 00_Master_Inventory_Index.xlsx
    ├── 01_LivingRoom
    │   ├── LR-01_TV_Damage.jpg
    │   ├── LR-02_Sofa_Damage.jpg
    ├── 02_Kitchen
    │   ├── KT-01_Fridge_Damage.jpg
    └── 03_Receipts
        ├── Receipt_BestBuy_TV.pdf
        ├── Invoice_Wayfair_Sofa.pdf
When the file names on your computer match the text in your spreadsheet, you remove 90% of the friction in the review process.
Grouping Low-Value Items
A common mistake I see is people trying to index every single fork, sock, and book individually. This creates a 2,000-line spreadsheet that is exhausting for you to build and exhausting for the adjuster to review. For low-value items, grouping is often an acceptable operational standard.
However, you need a rule of thumb. Do not group everything. Follow this split:
- ✅ Group This: Clothing batches (socks, underwear), kitchen utensils, paperback books, holiday decorations, bedding.
- ❌ Never Group This: Electronics (TVs, laptops), Jewelry, Fine Art, Antiques, High-end Furniture, Tools with serial numbers.
Good Grouping Example:
ID: LIB-01
Description: Library Collection – Hardcover Fiction (Qty 20)
Photo Link: Photo_Shelf_Overview.jpg
Handling Items With Missing Proof
You will not have a receipt for everything. That is a reality of life. The inventory index is the perfect place to get ahead of this conversation. If you leave the “Receipt Link” column blank, it looks like you forgot. If you fill it with a deliberate alternative, it looks like you are organized.
The “Method of Verification” Column
If you are missing many receipts, add a column to your index called “Method of Verification.” In this column, you state exactly how you are proving ownership for that item.
- 📄 Receipt: You have the actual invoice.
- 📷 Photo Identification: You don’t have a receipt, but the damage photo clearly shows the brand and model.
- 📦 Manual/Box: You have the instruction manual or original packaging.
- 📝 Affidavit: You are swearing to its existence because no paper trail survives.
Delivering the Index
Your inventory index (usually an Excel or Google Sheet) should be the first attachment in your evidence email. It is the cover letter for your stuff.
Format Matters
Send the index as an editable spreadsheet (XLSX) if possible, or a very clear PDF if the insurer insists on uneditable formats. Many adjusters prefer editable spreadsheets because they can copy your lines directly into their estimating software (like Xactimate). If you send a handwritten list scanned as a blurry JPEG, someone has to type that data in manually. Manual typing leads to typos, missed items, and delays.
Hello [Adjuster Name],
Attached is the Master Inventory Index for my personal property claim.
This spreadsheet lists all claimed items. For each item, I have listed the corresponding photo filename (Column E) and the receipt filename (Column F). All referenced photos and documents are attached to this email.
Please let me know if you have any trouble reading the file mapping.
Regards,
[Your Name]
The Post-Submission Follow-Up
Sending the file is not the end of the step. Files get caught in spam filters or blocked by security firewalls, especially zip files with macros or unusual formats. You need to close the loop.
Wait 3 to 5 business days after sending your index, then send a specific confirmation request. This connects directly to the document request protocol we use elsewhere.
To: Adjuster
Subject: Confirmation of Receipt – Inventory Index
Hello [Adjuster],
I sent my Master Inventory Index and evidence pack on [Date]. Could you please confirm by reply that you were able to open the file and that the format works for your system?
If I do not hear back by [Date + 2 days], I will assume the file was received and is under review.
Common Friction Points (Things Adjusters Hate)
Even with good intentions, I see policyholders make structural errors in their index that cause friction. Avoid these patterns:
1. Broken Local Hyperlinks
Do not create hyperlinks in your Excel sheet that point to files on your own computer (e.g., `C:/Users/Rowan/Documents/Receipt.pdf`). When the adjuster opens that spreadsheet on their computer, that link is dead. Just list the filename as text.
2. The “Giant PDF” Without Page References
If you scan 50 receipts into one big PDF, you must tell the adjuster which page to look at. Listing “See Receipt Pack” for 50 different items forces them to scroll endlessly. Use “Receipt Pack (Page 4)” instead.
3. Vague Grouping of High-Value Items
Listing “Jewelry” as a single line item for $5,000 will almost always trigger a request for more detail. You don’t need to list every bead, but you must break down significant pieces. Vague grouping on expensive items looks like you are hiding something.
The Update Protocol
Claims move in waves. You will remember the holiday decorations in the attic later. This creates version control problems. Establish a naming convention for your index updates. Include the date in the filename.
Example: `Smith_Inventory_Index_2023-10-12.xlsx`
When you send an update, explicitly tell the adjuster what changed.
To: Adjuster
Subject: UPDATED Inventory Index – Added 5 Items
Please discard the previous inventory list from Oct 12th. Attached is the updated version dated Oct 25th. The only changes are rows 45-50 (Guest Room items) which have been added.
Final
The inventory index is more than just a list; it is a communication tool. It tells the insurance carrier that you are organized, that you have evidence, and that you are making their job easier. In a process that is often adversarial and chaotic, being the person who provides a clear map is the best way to protect your timeline. Start with the big items, link your proofs clearly, and keep your versioning clean.
❓ FAQ
📝 What is the best format for an insurance inventory list?
A digital spreadsheet (Excel or Google Sheets) is best. It allows adjusters to copy-paste your data directly into their system, which speeds up processing. Handwritten lists are harder to read and require manual entry, increasing the chance of errors.
📸 How do I link my photos to my inventory list?
Create a column in your spreadsheet named “Photo Reference.” Rename your image files to match the item name (e.g., “LivingRoom_TV.jpg”) and paste that exact filename into the spreadsheet cell next to the TV entry.
📄 Do I have to list every single item separately?
Not always. High-value items (electronics, jewelry, furniture) must be listed individually. Low-value items (socks, Tupperware, books) can often be grouped, such as “Men’s Socks – Qty 10,” as long as you have a photo showing the group.
📂 Should I submit one index per room or one master index?
A single master index is usually better because it keeps all your totals in one place. However, organize that master index with clear headers for each room (e.g., “SECTION: KITCHEN”) so it is easy to navigate.
🔗 Do I need separate links for proof of ownership vs proof of damage if it is the same photo?
Yes, list the filename in both columns. If “IMG_123.jpg” shows the TV destroyed AND shows the model number, paste “IMG_123.jpg” in the ‘Damage’ column and the ‘Ownership’ column. This confirms you have satisfied both requirements.
🧾 What if I don’t have receipts for items on my list?
List the item anyway. In the “Proof” column, note “Photo Evidence Only” or “Affidavit.” You can prove ownership through photos, manuals, or bank statements even without a store receipt.
💻 Can I use an app to make my inventory index?
You can, but ensure the app allows you to export to Excel or PDF. Proprietary app formats that the adjuster cannot open are useless. A simple spreadsheet is often safer and more universally accepted.
📅 When should I submit my inventory index?
Submit it as soon as it is substantial enough to be useful. You don’t have to wait until it is 100% complete. You can submit a “Partial Inventory – Living Room” to get the process moving, then submit other rooms later.
📤 How do I send the index if the file is too big?
The spreadsheet itself will be small. If the attached photos make the email too big, send the spreadsheet in the main email and provide a link to a cloud folder (like Dropbox or Google Drive) for the photos, or send photos in separate batches labeled by room.
🏷️ Should I include the age of the items?
Yes. Age and Condition are critical for calculating depreciation (ACV). If you omit them, the insurer may assume the item is older or in worse condition than it actually was.
⚠️ Disclaimer: PropertyClaimChecklist.com provides practical guidance, process checklists, and example follow-ups to help you organize a property claim and move it forward. It is not policy language, claim documentation, legal content, or a substitute for your insurer's instructions. Always rely on your carrier's requirements and your actual policy terms for what must be submitted and how decisions are made.