- Building a sustainable ALE (Additional Living Expenses) routine – like capturing receipts daily and logging them weekly – helps prevent your file from overwhelming the reviewer.
- A best practice is to write the context directly on the physical receipt (who, what, and why) before taking a photo.
- Avoid sending a disorganized pile of loose images. Combining your proof into a single PDF packet with a clear cover page index often speeds up the review.
- Hold onto the original paper receipts in a safe envelope even after uploading digital copies, just in case a digital file is unreadable.
The Hidden Paperwork Trap of Temporary Housing
When you are forced out of your home, your immediate focus is entirely on finding a safe place to sleep and establishing some sense of normalcy. The last thing on your mind is becoming an amateur accountant. However, organizing your ALE receipts and documentation from day one is one of the most critical habits you can build to keep your file moving forward without unnecessary friction.
In my time working in claims operations, I have seen exactly how temporary housing paperwork is processed on the other side of the screen. The reality is quite simple. When a clean, logical, and well-indexed packet of receipts arrives, it can be reviewed and approved quickly. When a reviewer receives an email with forty unlabeled, sideways, blurry photos of diner receipts, the file inevitably slows down. The reviewer has to stop, rotate images, guess what the expenses are for, and send a request for clarification.
I want to help you build a system that prevents those delays. You do not need expensive software or a background in finance. You just need a practical, weekly routine to capture your out-of-pocket costs, log them clearly, and package them so the person reviewing your file has absolutely no questions to ask. Let us walk through the exact steps to build a bulletproof documentation habit for your temporary living expenses.
Understanding Your Normal Baseline Versus Extra Costs

Before you start saving every single piece of paper you touch, it helps to understand what you are actually trying to prove. The concept of additional living expenses is about the word “additional.” You are documenting the difference between what it normally costs you to live and what it is costing you right now because of the displacement.
A common point of confusion I see often is when a homeowner submits every single grocery receipt, assuming the entire food bill is covered. Typically, it is only the increased cost that matters. If your normal grocery budget is a specific amount, and now you are forced to eat at restaurants every day because your hotel has no kitchen, your documentation needs to show that sudden spike in spending.
Key Point: You are building a paper trail that proves exactly how much extra money is leaving your pocket due to your temporary living situation. Clarity is your best tool here.
Setting Up Your Proof Foundation
To establish this baseline, you will often be asked to provide historical proof of your normal expenses. Do not let this surprise you. Gather your previous utility bills, typical grocery spending records, and standard commuting mileage before the incident occurred. Keeping this “before” snapshot clearly separated from your “after” expenses makes the review process infinitely smoother.
A highly effective method is the three-month lookback. Pull your bank and credit card statements for the three months immediately preceding the incident. Calculate your average monthly grocery bill and your average monthly utility costs. When you submit your claim, you are simply asking the reviewer to cover the “delta” – the difference between your new temporary housing costs and your historical three-month average.
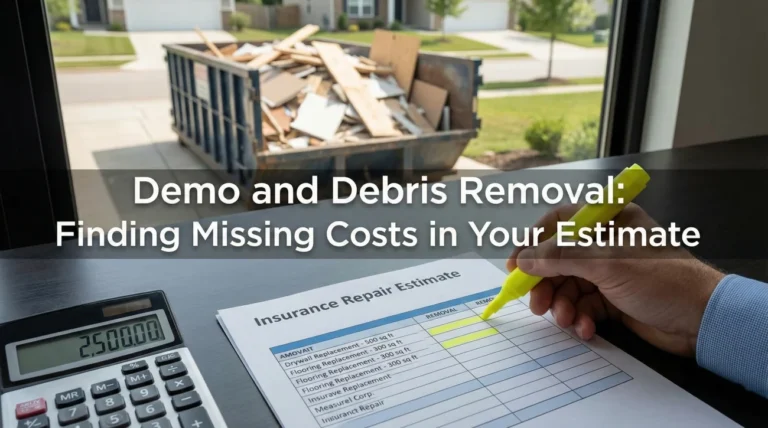
The Master ALE Receipts and Documentation Checklist
Organization begins with knowing exactly what to save. It is far better to save an item and not need it than to try and hunt down a reprint from a restaurant three weeks later. If you are setting up your master file system right now, make sure to cross-reference our core property claim documents checklist to see exactly where your temporary housing paperwork fits into your broader documentation strategy.
Here is a practical breakdown of the items you must capture, isolate, and store safely.

Housing and Utility Proof
- 📄 Hotel folios showing a zero balance at checkout.
- 📄 Short-term lease agreements signed by both parties.
- 📄 Security deposit receipts for temporary rentals.
- 📄 Invoices for temporary furniture rental if the unit is unfurnished.
- 📄 Connection fees for setting up utilities at the temporary address.
- 📄 Monthly utility bills for the temporary housing (to compare against your normal bills).
Food and Sustenance Records
- 📄 Itemized restaurant receipts (showing exactly what was ordered, not just the final credit card slip).
- 📄 Grocery receipts (especially if you are buying smaller, more expensive quantities due to lack of storage).
- 📄 Receipts for essential disposable items if your temporary housing lacks kitchenware.
Transportation and Pet Logistics
- 📄 Maps showing the increased mileage from your temporary home to your workplace or children’s school.
- 📄 Receipts for public transit if your commute method had to change.
- 📄 Invoices from pet boarding facilities if your temporary housing does not allow animals.
- 📄 Receipts for extra laundry or dry cleaning services if your temporary home lacks washing machines.
Common Expense Guardrails
Reviewers pay close attention to certain categories. Alcohol is generally not covered under temporary living expenses. If your grocery bill suddenly spikes well beyond your historical average, or if you include non-essential upgrades, the reviewer will likely flag it. If you have an unusual but necessary expense, write the context clearly on the receipt so they do not have to guess why it was included.
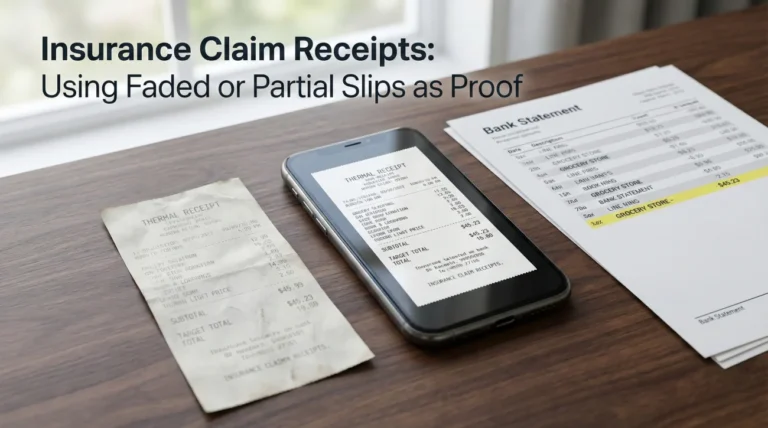
<strong⚠️ Warning: Bank statements alone are rarely sufficient proof. A line item on a bank statement proves you spent money at a location, but it does not prove what you bought. You must keep the itemized store receipt to pair with it.
The Weekly Organization Method (How to Stay Sane)
If there is one piece of operational advice I want you to take away, it is this: do not wait until the end of the month to organize your paperwork. The mental load of sorting through a mountain of crumpled paper while you are already dealing with property loss is too high. You need a frictionless, weekly routine.
I recommend a simple three-step rhythm that I have seen work incredibly well for families navigating complex displacements. It keeps the data clean and prevents lost items.

Step 1: The Daily Capture Habit
Every time you receive a paper receipt related to your displacement, take a pen and write three things directly on the front of the receipt, in an empty space: the date, who the expense was for, and a brief reason. For example, “Dinner, family of four, hotel has no kitchen.”
Once you write on it, immediately take a clear, well-lit photograph with your smartphone. Make sure all four corners of the receipt are visible and the text is legible. Then, place the physical paper into a designated envelope or folder that you carry with you.
Step 2: The Friday Night Logging Session
Pick one evening a week to process the data. I usually suggest Friday. Sit down with your physical envelope and your phone. Open a simple spreadsheet or a physical ledger. You only need a few columns to track your ALE receipts and documentation effectively.
| Date of Expense | Vendor / Location | Category | Total Amount | Notes / Purpose |
|---|---|---|---|---|
| Oct 12 | Main Street Diner | Food | [Exact Total] | Dinner – No kitchen at hotel |
| Oct 14 | City Transit | Commute | [Exact Total] | Extra train fare from temp housing |
Match every physical receipt to a line on your log. If you are missing a paper copy, track down the digital photo you took in Step 1. This weekly reconciliation takes about fifteen minutes, but it completely removes the anxiety of a massive monthly sorting project.
Step 3: The End-of-Month Consolidation
At the end of your billing cycle or month, your log is already updated. All you have to do is gather your scanned images, arrange them in chronological order matching your log, and combine them into a single file. You print your log to use as a cover sheet. This creates a highly professional packet that is remarkably easy for a desk adjuster to approve.
Where Most Files Fall Apart (And How to Avoid It)
In day-to-day claims operations, you quickly notice patterns. When a temporary housing submission gets delayed or returned with questions, it is rarely because the expenses are invalid. It is almost always an issue with formatting, clarity, or missing context. Let us look at a practical example of how a submission goes wrong, and how to fix it.
Imagine a scenario where a family is staying in a hotel for a month. They eat out twice a day. At the end of the month, they email sixty separate JPEG images of food receipts from their phone directly to the adjuster’s email address, with the subject line “Food receipts.”
From an operational standpoint, this is a nightmare to process. The images arrive out of order. Some are upside down. The reviewer has to open sixty separate attachments, figure out the date on each, manually build a spreadsheet, and try to understand what was ordered. This guarantees a slow response.
Sending dozens of loose, raw image files via email with no explanation, no organization, and no total sum requested.
Pasting two or three receipts neatly onto a standard digital document, adding text notes next to them, combining everything into one PDF, and placing a summary log on the very first page.
📌 Note: Another common error is submitting the final credit card signature slip instead of the itemized bill. The signature slip proves you paid, but it does not prove what you purchased. Reviewers need to see the itemized breakdown to verify no restricted items were included.
Packaging and Submitting Your Proof
How you submit your ALE receipts and documentation is just as important as what you submit. You want to control the narrative and make the review process effortless. Always present your paperwork as a unified packet rather than a scattered collection of files.

The Cover Page Index
Your monthly packet should always start with a clean cover page index. This acts as a map for the adjuster. Here is the standard format I recommend:
| Line # | Date | Vendor | Amount | Receipt Page # |
|---|---|---|---|---|
| 1 | Oct 12 | Main Street Diner | [Exact Total] | Page 2 |
| 2 | Oct 14 | City Transit | [Exact Total] | Page 3 |
Creating the Monthly Packet
If you are submitting digital files, take the time to merge them. Use a basic program to combine your cover sheet log and your receipt images into a single PDF document. Name the file logically so it cannot be misplaced in their system.
[Year-Month-Day] - [Last Name] - ALE Submission Packet - October.pdf
If you have small physical receipts and need to scan them, tape them flat to a standard piece of printer paper first. You can fit several receipts on one page. Write your claim number at the top of that piece of paper, and then scan it. This prevents small, curly receipts from jamming a scanner and creates a neat, uniform page size for your digital file.
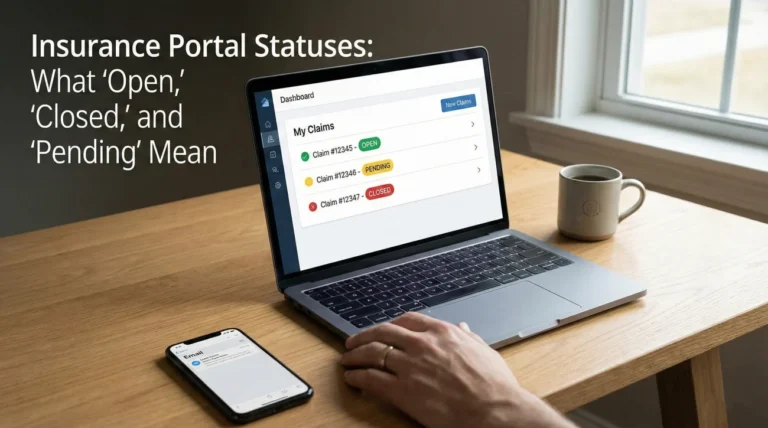
Establishing Proof of Submission
Once you send your packet, your job is not quite done. You must generate proof that you actually submitted the files. If you use a portal, take a screenshot of the confirmation screen showing the file name and the timestamp. If you send an email, save the sent message with the PDF attached in your own dedicated claim folder. Files do get lost in transit, and having strict proof of your submission date protects you from unnecessary delays.
Communication Scripts for Temporary Housing Updates
Whenever you hand over your documentation, you must wrap it in clear, polite, and firm communication. You want to establish what is in the packet, what you expect them to do with it, and ask for a written confirmation. Relying on phone calls for these handoffs often leads to confusion later.
Here are copy-paste safe frameworks you can adapt for your own correspondence. Keep your tone neutral and heavily focused on process.
Script: Submitting the Monthly Packet
Use this format when you are sending your organized file for review. It sets expectations immediately.
Hello [Adjuster Name],
Please find attached a single PDF document containing my organized temporary housing and additional living expenses for the period of [Start Date] to [End Date].
The first page of the attachment is a summary log detailing each expense, followed by the corresponding itemized receipts in chronological order.
Could you please reply to confirm that this file has been received and let me know if you need any additional clarity on these specific items?
Thank you for your time,
[Your Name]
Claim: [Your Claim Number]
Script: Requesting Written Requirements
If you are confused about what exactly they want you to track, do not guess. Ask for their requirements in writing before you start building your system.
Hello [Adjuster Name],
To ensure I am organizing my temporary housing paperwork exactly as your team needs it, could you please provide a written checklist of the required document types for Additional Living Expenses?
Specifically, I would like to know your preferred formatting for food receipts, utility variations, and mileage tracking. Having these requirements in writing will help me submit clean, organized files and save your team review time.
Thank you,
[Your Name]
💡 Pro Tip: If you have an established portal, you may be required to upload documents there. Even if you do, it is a smart practice to send a brief email stating, “I have successfully uploaded the ALE packet for October to the portal today. Please confirm it is visible on your end.”
Final Thoughts on Keeping Your File Clean
Managing ALE receipts and documentation is an endurance task. It requires patience and a commitment to a weekly routine. It is very easy to fall behind when you are exhausted from managing a damaged property, but keeping this specific paperwork tight is your best defense against out-of-pocket financial stress.
Always remember your core operational rules: write context on the physical paper, digitize it immediately, log it weekly, and combine it into a clean packet before submission. By treating your proof like a professional invoice, you remove the friction from the review process. Take it one week at a time, rely on your tracking log, and always ask for confirmations in writing.
❓ FAQ
🧾 What receipts do I actually need to keep for temporary housing?
You need to keep itemized receipts for anything that costs more than your normal life. This typically includes hotel folios, temporary rent, restaurant meals, extra commuting fuel, pet boarding, and laundry services. Always keep the itemized version, not just the credit card signature slip.
📅 How often should I submit my living expense paperwork?
If you are floating large costs and need advances, you might agree to a bi-weekly schedule. Otherwise, submitting a combined, indexed packet once every 30 days is often the most efficient cadence. It prevents overwhelming the adjuster with daily emails and allows them to process your file in cycles.
🛒 Can I claim normal groceries on my paperwork?
In many cases, you are only documenting the increased cost of food. If your normal grocery budget is unchanged, it may not be viewed as an additional expense. However, if you are forced to buy more expensive pre-packaged items due to a lack of a kitchen, you should document that difference.
🔍 What happens if I lose a receipt for a meal or expense?
If you lose the physical paper, immediately check if you can download a digital invoice from the vendor or a detailed bank statement showing the exact transaction. Note the missing itemized receipt on your log, provide the alternative proof, and explain the context clearly.
📸 Do I need to keep the original paper receipts or are photos enough?
While digital photos are standard for submission, you should always keep the original paper receipts in a safe envelope until the entire claim is fully closed and settled. Sometimes reviewers may request to see the physical original if a digital copy is completely illegible.
📊 How do I prove my normal living expenses from before the incident?
Gather your bank and credit card statements from the three to six months prior to the damage. Look for your average utility bills, grocery store totals, and standard commute costs. This historical data creates the baseline needed to calculate your extra expenses.
🍕 Does ALE cover tips, delivery fees, and parking?
Reasonable tips (standard percentages) and necessary food delivery fees are typically covered if you are forced to rely on delivery due to your housing situation. Parking is covered if your temporary housing requires a paid parking fee that your original home did not. Always document the necessity.
⏱️ How long does it usually take to get reimbursed for these costs?
Timelines vary widely based on the complexity of the file and the clarity of your submission. A clean, well-indexed packet submitted with a summary log is typically processed much faster than a disorganized stack of loose images.
🏦 Should I just send my monthly bank statements to prove my costs?
No. A bank statement only shows a total amount paid to a vendor. It does not itemize what was purchased, meaning it cannot prove the expense was necessary for your displacement. Bank statements are supporting documents, but reviewers usually require itemized receipts.
🗂️ How do I organize small, easily lost receipts without getting frustrated?
Tape small receipts flat onto a standard piece of 8.5×11 printer paper. You can fit several on one page. Write notes next to them, write your claim number at the top, and scan the entire page as a single document. It keeps things neat and prevents scanner jams.
⚠️ Disclaimer: PropertyClaimChecklist.com provides practical guidance, process checklists, and example follow-ups to help you organize a property claim and move it forward. It is not policy language, claim documentation, legal content, or a substitute for your insurer's instructions. Always rely on your carrier's requirements and your actual policy terms for what must be submitted and how decisions are made.