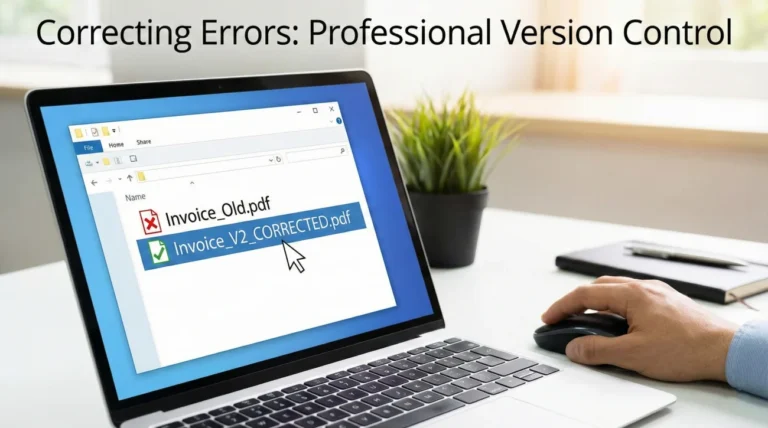
- Never upload raw, unnamed files. Rename every document so the adjuster knows exactly what it is before opening it.
- Do not treat the portal like a dump truck. Upload your files in logical, chronological batches to prevent system timeouts.
- Capture your own confirmation artifacts. Take a screenshot of the upload screen before you hit submit, and another of the success message.
- Use a written confirmation loop. Send a short email to your adjuster immediately after a portal upload to force a written record of receipt.
The Pre-Upload Checklist: Do This Before You Log In
A frequent mistake people make is trying to organize their files while they are actively logged into the portal. Most claim portals have strict security settings. If you spend twenty minutes deciding which photos to upload while the screen is sitting idle, the system will often quietly end your session. When you finally click submit, it drops the transfer.
Before you even open your browser, your files need to be perfectly staged on your computer. If you have not built your core paperwork foundation yet, I recommend reviewing the master system in the property insurance claim documents checklist to make sure you have everything gathered.
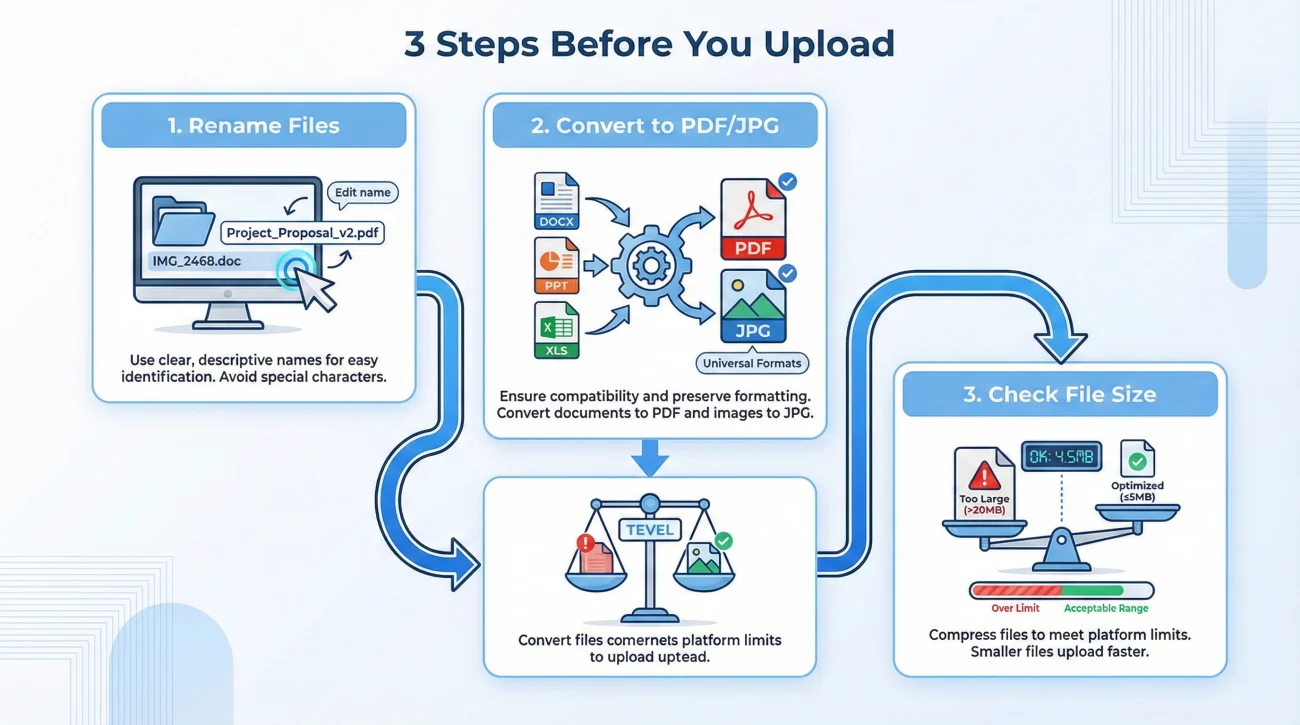
1. Rename Every Single File
When you upload an image called “IMG_4921.JPG” or a document called “Scan001.PDF”, you are forcing the adjuster to open every single file to figure out what it is. In a busy claims operation, this can slow down the review process.
Additionally, some older portal systems will automatically rename your files to long strings of system-generated numbers upon upload. If you ever need to reference a specific photo later, it becomes difficult to identify. Take control of the naming convention before the files leave your computer.
IMG_8832.JPG, Scan_Doc_Final.pdf, Estimate(1).pdf
2023-09-15_Kitchen_Ceiling_Damage_01.jpg, 2023-09-20_Plumbing_Repair_Invoice.pdf, 2023-09-25_Contractor_Initial_Estimate.pdf
2. Convert Files to Universal Formats
Just because your computer can open a file does not mean the claim software can. I have seen delays caused by proprietary file types. If you upload an Apple Pages document, or an HEIC image file direct from a newer smartphone, there is a chance the adjuster’s older Windows-based system will simply show an error code.
- ✅ Documents: Always convert to PDF. It locks the formatting and is universally accepted.
- ✅ Photos: Always convert to standard JPG or PNG.
- ✅ Videos: MP4 is generally safest, though many portals struggle with video files entirely due to size constraints.
3. Check Your Total File Size
Most portals will not explicitly tell you that there is a megabyte limit per upload batch until after you try to upload high-resolution photos and the screen freezes.
⚠️ Warning: Avoid trying to upload all your photos in a single massive batch. If one file in the batch triggers a size error, the entire batch may fail to attach to the file.
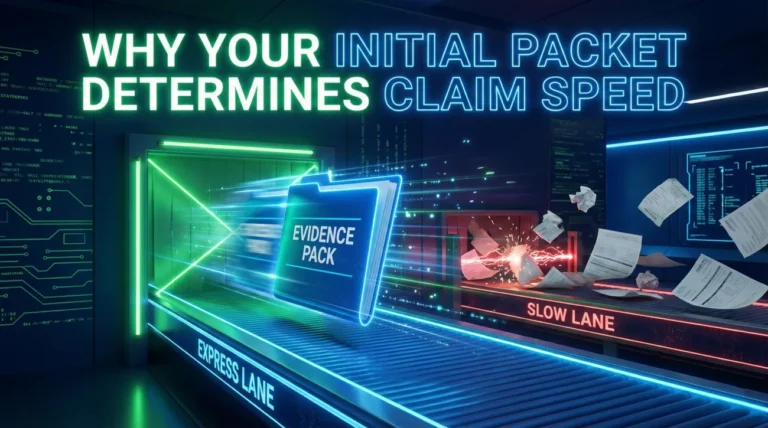
The Upload Sequence: Batching for Success
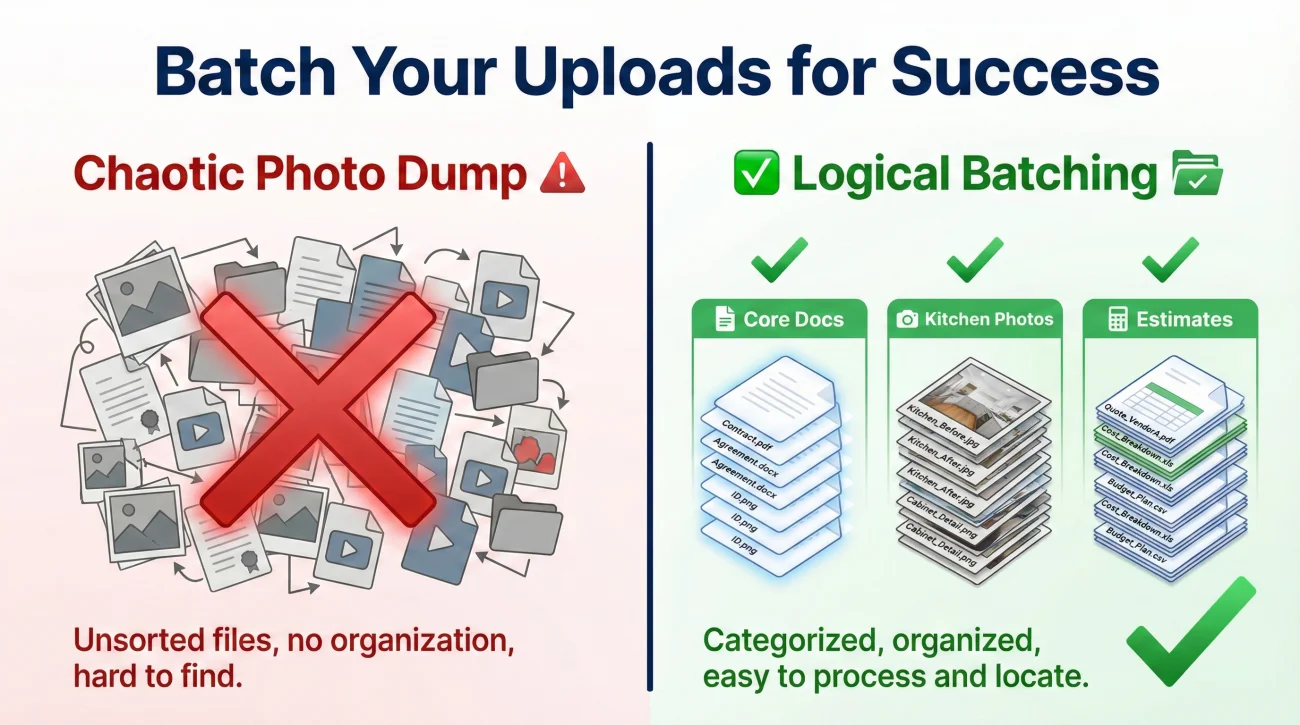
Once your files are named, converted, and sized correctly, it is time to log in. The goal here is to feed the system in small, digestible pieces. Think of it like mailing multiple important letters; you want to make sure each one is handled appropriately.
Key Point: Upload your documents in logical categories, not all at once. If the system crashes, you want to know exactly which category made it through and which one failed.
Batch 1: Core Documents First
Start with the paperwork that establishes the facts of the loss. This includes your communication logs, any emergency repair invoices, and initial estimates. These are usually small PDF files, so they often upload quickly and confirm without issues.
Batch 2: Photographic Evidence
Break your photos down by room or category. If you have forty photos, upload the ten kitchen photos in one batch. Wait for the confirmation screen. Then, upload the ten living room photos. In day-to-day claims ops, we often see smoother reviews when people submit bite-sized, clearly labeled evidence packs rather than a chaotic photo dump.
Here is a common field note based on how claim systems operate: When you upload a file, it does not instantly appear on the adjuster’s screen. It goes to a central server, often gets scanned for viruses, and then syncs to the specific claim software. Massive photo batches sometimes fail during this sync phase. Batching reduces the risk of the sync timing out.
Using Portal Description Boxes
Many portals offer a small text box next to the upload button asking for a description. Keep this incredibly brief. Use this box purely as an index tag rather than a narrative.
[Date] + [Category] + [Item Count]
For example, you might type: “Oct 12 – Kitchen Water Damage Photos – 10 Items.” This gives the reviewer immediate context.
Confirmation Artifacts: Building Your Proof of Submission
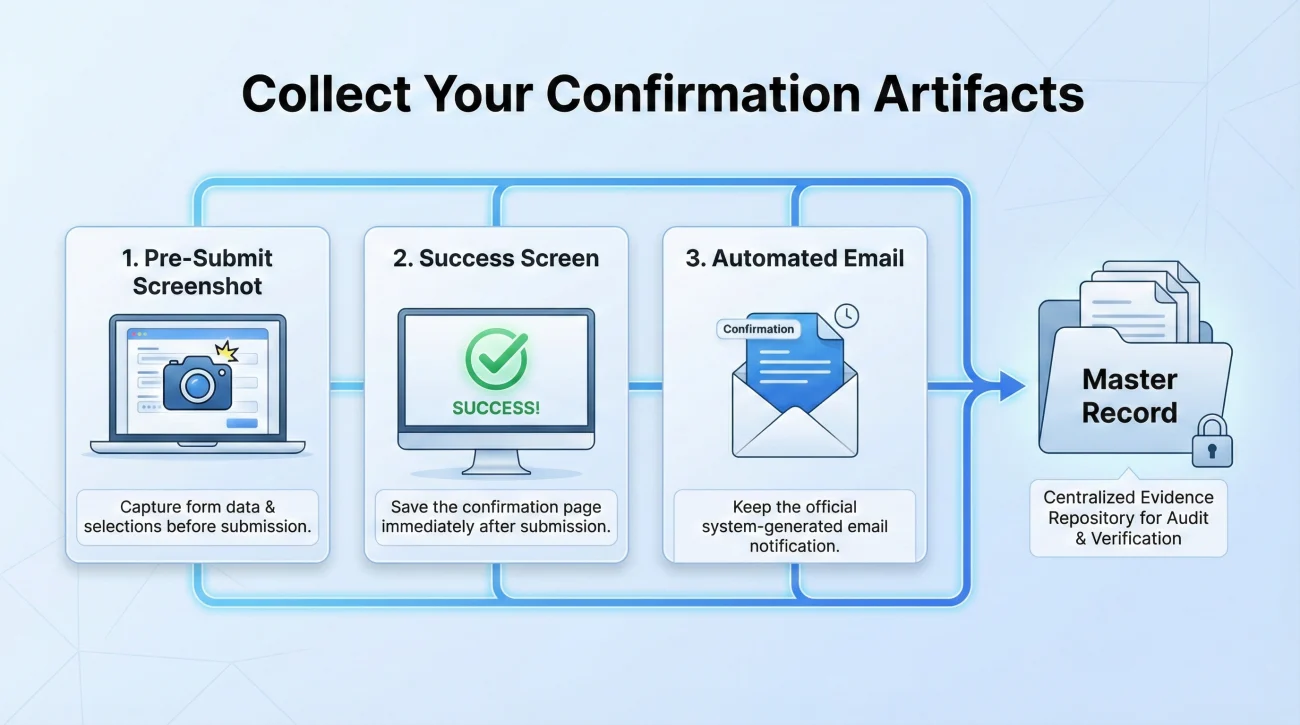
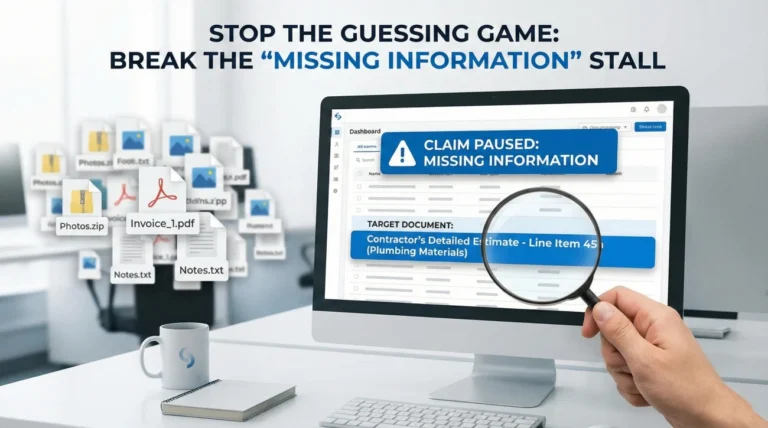
This is a highly practical step. It is generally safer to operate under the assumption that a software glitch could misplace your files. If an adjuster notes that they are looking at the system and there is no estimate attached, you want to be able to politely provide evidence that you uploaded it.
To do this, you collect Confirmation Artifacts. These are pieces of recordkeeping that show you completed your part of the process.
| The Artifact | When to Capture It | Why You Need It |
|---|---|---|
| The Pre-Submit Screenshot | Right before you click “Upload” or “Submit.” | Proves the exact file names that were selected and ready in the system queue. |
| The Success Screen | Immediately after the portal says “Upload Complete” or “Files Received.” | Captures evidence of submission, preferably showing the date and time on your screen. |
| The Automated Email | When it arrives in your inbox (usually within 10 minutes). | Provides the system-generated tracking number for the upload session. Save this as a PDF. |
What the Portal Confirms vs. What It Does Not
- Portal Success Screen: Confirms the web system received the data, but not that a human has seen it.
- Automated Email Receipt: Confirms a tracking number was generated, but not that the files synced properly to the adjuster’s specific software folder.
- Human Confirmation (Email Reply): The only proof that the adjuster can actually open, read, and use your files.
A Realistic Portal Scenario
Let us look at a standard situation. A homeowner named Sarah needs to submit her contractor’s final estimate. She logs in, attaches the file, clicks submit, and sees a green checkmark. She closes her laptop.
Two weeks later, the adjuster mentions the file is missing. Because Sarah only saw the green checkmark but did not document it, she has little leverage to correct the timeline. She resubmits it, and her claim timeline effectively resets.
Now, let us look at the preferred method. Sarah stages “2023-11-04_Smith_Construction_Estimate.pdf”. She takes a screenshot of the file loaded in the portal interface. She clicks submit. She takes a screenshot of the green checkmark showing the time. When the adjuster says the file is missing later, Sarah does not argue. She simply replies with the screenshot and a polite note indicating the exact time the system accepted it.
The Written Confirmation Loop
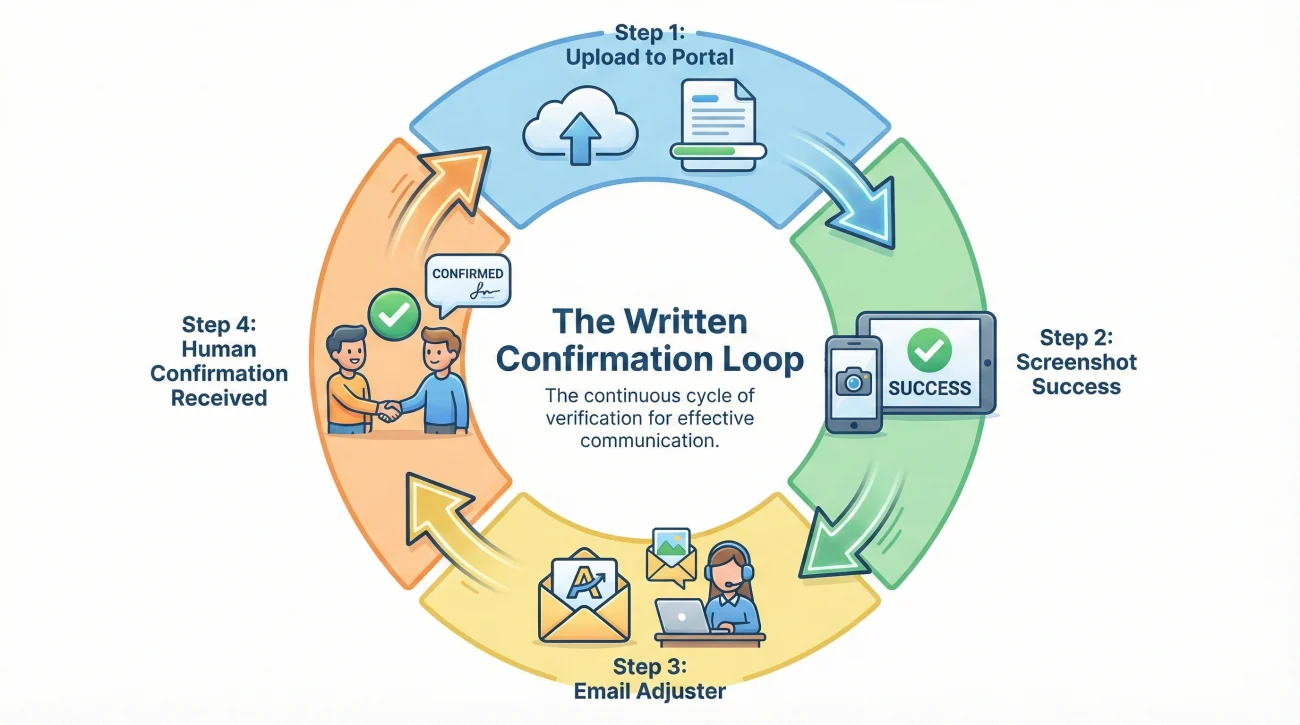
Capturing screenshots protects your records defensively, but you also need to play offense. It is rarely enough to just upload files into the portal and wait. You have to prompt the claim operation to acknowledge receipt on the human side.
I call this the Written Confirmation Loop. Immediately after you finish a portal upload session, you step out of the portal and send a direct email to the adjuster. You are not attaching the files again; you are simply creating a permanent, time-stamped paper trail that tells them to go look for the files.
💡 Pro Tip: Adjusters manage many files at once. They may not get a flashing notification every time a homeowner uploads a document. Your email acts as the manual ping.
Script: The Post-Upload Notification
Use this simple, neutral message to confirm your submission. It is polite, sets a clear expectation, and creates a clean paper trail.
Subject: Portal Upload Confirmation: Claim # [Your Claim Number]
Hello [Adjuster Name],
I am writing to confirm that I just uploaded a new batch of documents to the claim portal today, [Date].
The upload included:
– 1 PDF: Contractor Repair Estimate
– 10 JPGs: Kitchen damage photos (Batch 1)
I have saved the portal confirmation screens for my records. Please reply briefly to confirm that these files are visible on your end so we can ensure the system synced correctly.
Thank you for your time,
[Your Name]
What to Do When the Portal Errors Out
If you hit submit and the portal crashes, freezes, or gives you a server error, do not keep clicking the button.
When people repeatedly hit submit during an error, it often creates duplicate entries in the background. From an operational side, this means the reviewer opens the file and sees five identical copies of an estimate. They now have to spend time verifying which one is the final version, which can unnecessarily extend your review time.
Instead, take a screenshot of the error message. Then, bypass the portal completely using this backup script.
Subject: Document Submission / Portal Error: Claim # [Your Claim Number]
Hello [Adjuster Name],
I attempted to upload the requested contractor estimate to the online portal today at [Time], but the system returned a server error. I have attached a screenshot of the error for your IT team if needed.
To ensure this does not delay the review process, I have attached the PDF directly to this email instead.
Please confirm receipt of this email and the attached estimate so I know my file is up to date.
Best regards,
[Your Name]
Final Thoughts: The Rule of Two
Navigating an insurance portal does not have to be a guessing game. By treating the portal as just one part of your overall documentation strategy, you protect yourself against software bugs and administrative delays.
Many successful claimants practice the Rule of Two: If a document exists in the portal, an identical, cleanly named copy exists on your local hard drive, backed up by records proving it was sent. The portal is their system, built for their convenience. Your local folder, your file naming conventions, and your written email confirmations are your system.
Taking the extra five minutes to rename your files, batch your uploads, and send that confirmation email can often be the difference between a file that stays on track and one that gets caught in administrative limbo.
❓ FAQ
📱 How do I know if my claim documents actually uploaded?
You generally know they uploaded when you receive two things: a success message on the portal screen (which you should screenshot) and a written email reply from your adjuster confirming they can open and view the files on their end.
📂 What do I do if my insurance portal says the file size is too big?
Break your upload into smaller batches. Instead of uploading 30 photos at once, upload them in groups of 10. If a single PDF is too large, try saving the document at a lower resolution, or email it directly to the adjuster noting the portal limit.
📸 Should I upload claim photos one by one or in a folder?
Most portals do not accept zipped folders and will strip away folder structures. You usually have to upload files individually. Select a batch of 5 to 10 clearly named photos at a time rather than clicking them one by one.
⏱️ Why does the insurance claim portal keep timing out?
Portals have strict security sessions that often expire after 10 to 15 minutes of inactivity. If you are taking a long time to search for files on your computer while the browser is open, the system may time out. Organize your files first, then log in and upload quickly.
📑 Can I upload Word documents to my insurance claim portal?
It is generally not recommended. Word documents can lose their formatting when opened on a different computer, and some portals block them for security reasons. Saving your Word documents as a PDF before uploading is safer.
🛑 What happens if I accidentally upload the wrong document?
Do not panic, but do not rely on the portal’s “delete” button, as the file may have already synced. Send a brief email to your adjuster stating the specific file name of the document uploaded in error, ask them to disregard it, and then upload the correct file.
📧 Is it better to email my claim adjuster or use the portal?
Using the portal for the actual file transfer is usually best because it attaches directly to your claim record. However, always following up with a short email to the adjuster stating that you uploaded the files forces a helpful written confirmation loop.
🖨️ How do I get proof that I submitted documents through the portal?
Take a screenshot of the portal screen right before you click submit, and another screenshot of the final “Success” screen. Capturing your computer’s date and time in the corner of the screenshot adds stronger proof.
🗂️ Does the adjuster get an alert when I upload new files?
Not always. Many claim systems do not send push notifications to the adjuster. The files may simply sit in the digital folder until the adjuster decides to manually review your file again, which is why a notification email is important.
🔄 What should I do if the portal says “system error” after I click submit?
Stop trying to force the upload to prevent creating duplicate files. Take a screenshot of the error code. Attach your files directly to an email, send them to your adjuster, explain the portal error, and ask them to confirm receipt.
⚠️ Disclaimer: PropertyClaimChecklist.com provides practical guidance, process checklists, and example follow-ups to help you organize a property claim and move it forward. It is not policy language, claim documentation, legal content, or a substitute for your insurer's instructions. Always rely on your carrier's requirements and your actual policy terms for what must be submitted and how decisions are made.