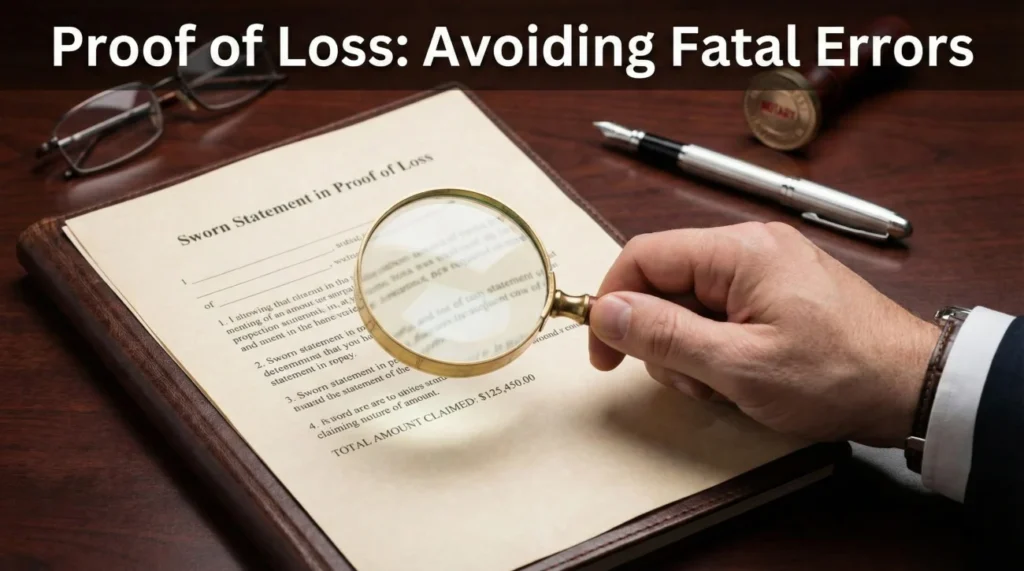
- A sworn statement in proof of loss is a formal, notarized document that creates a locked-in record of your claim details at a specific point in time.
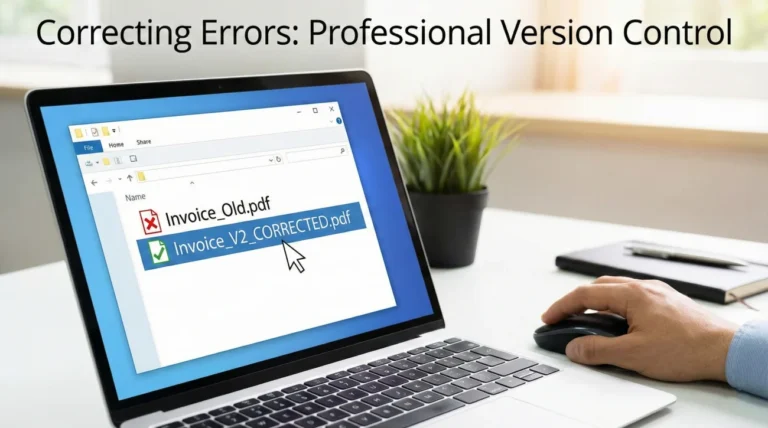
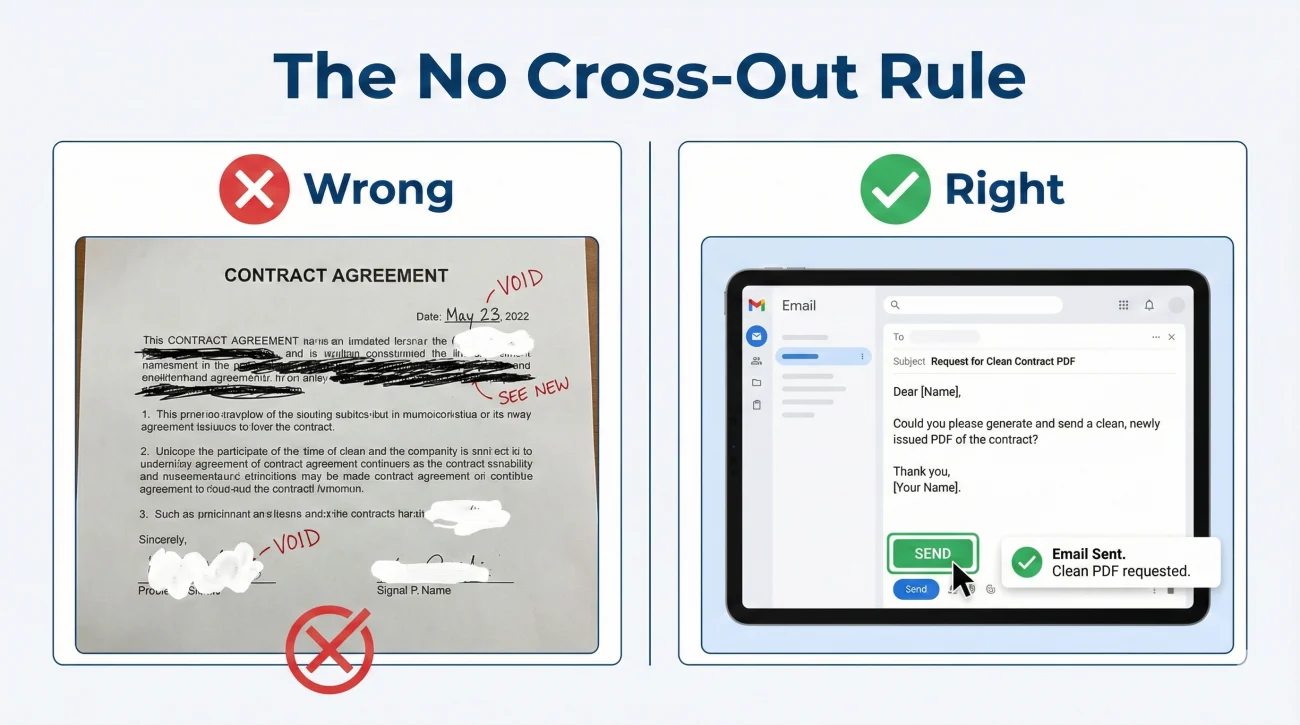
- Never cross out mistakes or use correction fluid on this form. Always request a clean, updated version in writing before you sign.
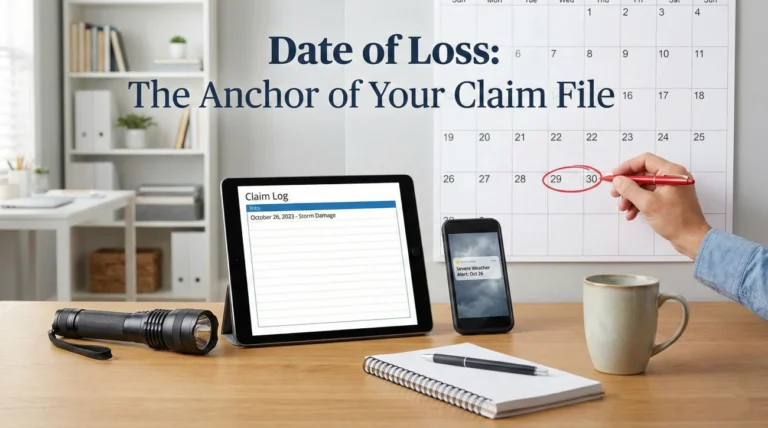
- Before visiting a notary, verify that every date, spelling, and referenced attachment exactly matches the rest of your claim file to prevent processing delays.
- Always scan the fully signed and notarized physical document before mailing it back, and maintain a clear paper trail of your submission.
The Reality of Formal Claim Paperwork
When you are managing a property claim, you handle a lot of casual paperwork. You send quick emails, upload daily photos, and jot down notes from phone calls. But eventually, the process shifts. You will receive a document that requires a formal signature, often in front of a notary public. In my experience working in claims operations, this is the exact moment when the process feels intimidating for most people.
The document you are likely looking at is a sworn statement in proof of loss. The name itself sounds heavy. It is designed to be a definitive, formal declaration of what happened to your property and the current scope of the damage you are claiming.
I want to help you take the stress out of this specific document. From an operational standpoint, this form is simply a data-entry anchor. It takes all the scattered emails, estimates, and phone calls and condenses them into a single piece of paper that the processing department can file away as the official record. While specific processing rules can vary slightly depending on your insurance carrier or state regulations, the fundamental need for data accuracy remains the same everywhere. My goal is to walk you through how to review this document calmly, how to spot the clerical errors that commonly delay files, and how to safely return it so it does not get lost in the system.
Anatomy of the Form: What You Are Actually Looking At
Before you pick up a pen, it helps to understand how these forms are built. While every company formats their paperwork slightly differently, the core fields are almost always identical. When I look at one of these forms, I am scanning for very specific data points that must line up exactly with the internal system.
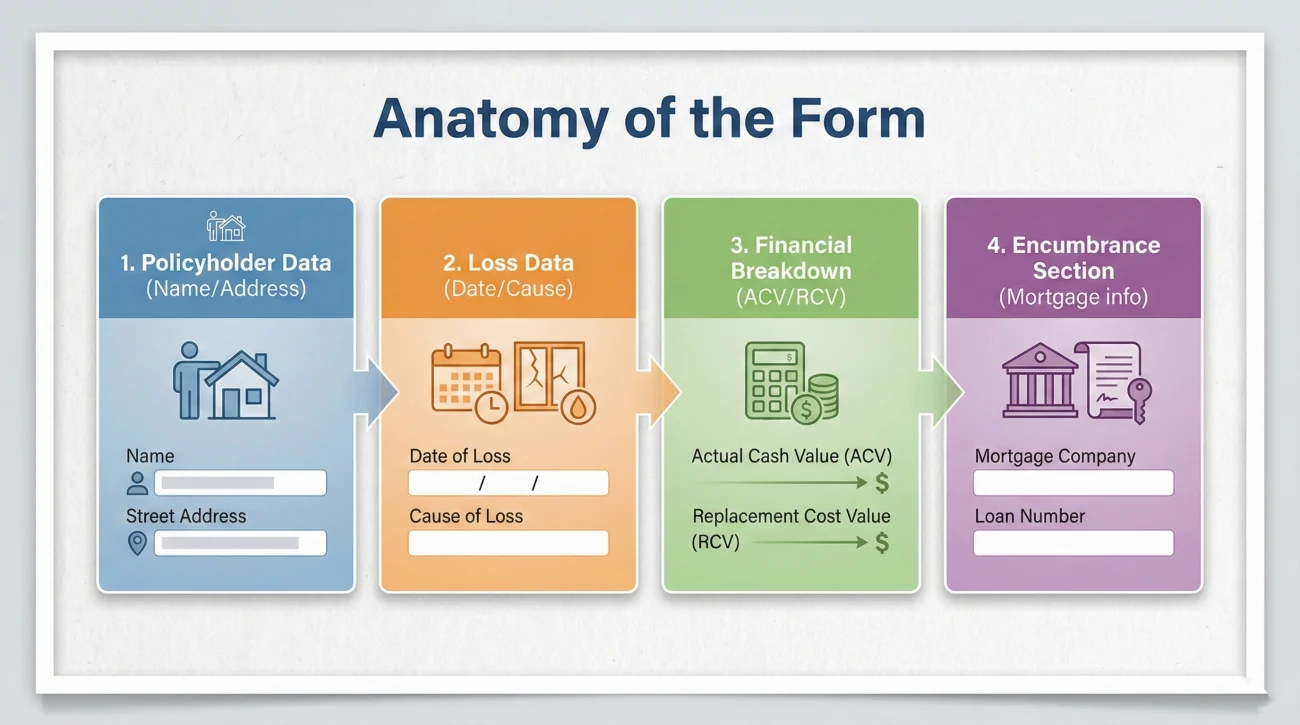
Usually, the form is broken down into a few distinct blocks of information. First, you will see the policyholder data. This includes your exact name, the property address, and your policy number. Second, you will see the loss data. This includes the date the damage occurred, the time of day, and the specific cause of the damage.
The third section is usually the financial breakdown. It may reference the “actual cash value” or the “replacement cost” of the damage, and it often points to a specific estimate or inventory list attached to the form. Finally, there is the encumbrance section. This is where you declare if anyone else has a financial interest in the property, such as your mortgage lender.
Understanding these blocks is critical because an error in any one of them will cause the system to reject the form. It is not about someone trying to trick you; it is about data hygiene. If the computer system says the date of loss was the 14th, but the form says the 15th, the file stops moving until someone figures out which date is correct.
Skimming the document and assuming the adjuster filled it out perfectly based on your previous phone calls.
Reading every single field like an auditor, comparing the form’s data against your own written records before signing.
The Pre-Signature Verification Protocol

When you receive the blank or partially filled form, you must treat it like a rough draft until you verify it yourself. I recommend sitting down in a quiet room with the form, your policy documents, and your claim communication log. You are going to do a side-by-side comparison.
Here is the exact verification checklist you should run through before you even think about finding a notary:
- 🔎 The Name Check: Does the name on the form exactly match the name on your policy declarations page? Look out for missing middle initials or misspelled last names.
- 📅 The Date Anchor: Check the date of loss. This is the most common point of failure. It must exactly match the date you originally reported the damage.
- 📍 The Property Location: Verify the physical address of the damaged property. Ensure it is not accidentally listing your temporary housing address or a mailing PO Box.
- 🔢 The Policy Number: Read the policy number aloud, digit by digit, and compare it to your official documents. A single transposed number will send the form to an error queue.
- 📎 The Attachments Rule: If the document says “See attached Exhibit A” or references a specific estimate amount, you must physically have that exact attachment in your hand. Never sign a form that references an invisible or missing attachment.
Key Point: You are not just verifying that the information is mostly correct. You are verifying that the data on the paper is completely consistent across your claim records since day one. Consistency is what keeps a file moving.
The 5-Minute Amount Sanity Check
Beyond names and dates, the financial figures are where processing engines frequently flag discrepancies. Before you sign, run this quick sanity check on the numbers:
- ✅ Is your policy deductible correctly stated?
- ✅ Does the final number explicitly note if it is “net of deductible”?
- ✅ Does the listed total point to the correct, most recent version of the adjuster’s estimate?
- ✅ Are all pages of that referenced estimate or inventory physically attached to the form?
What This Form Locks In (And What It Cannot)
I often see people hesitate to sign this document because they worry they are closing their claim forever. Generally, a sworn statement in proof of loss locks in the facts and the known financial amounts at that specific point in time. It does not necessarily mean you cannot supplement the claim later if a contractor discovers hidden damage.
However, you need to be completely clear on what the current amount represents. If you are not sure whether the total listed is the Actual Cash Value (ACV), the Replacement Cost Value (RCV), or if your deductible has already been applied, do not guess. Ask your contact for clarification by email before you sign anything to ensure you are not agreeing to an amount you misunderstand.
Handling Errors Without Making the File Messier
It is incredibly common to find mistakes on these forms. Often, these documents are generated automatically by a software system pulling data from a central file. If someone typed your name wrong on the very first day, that typo will follow you all the way to this final document.
I have seen many people try to fix these errors themselves. They will take a black pen, cross out the wrong date, write the correct date in the margin, initial it, and send it back. In my day-to-day claims ops experience, this often triggers extra review and slows the file down. Manual cross-outs on formal, notarized documents can trigger security protocols or require a secondary manual review to ensure the document was not tampered with after the notary stamped it.
If you find a mistake, the cleanest, safest operational move is to stop. Do not alter the document. Instead, you need to request a newly generated, clean version of the document from your contact.
Here is a polite, clear way to request that correction in writing:
Hello [Adjuster Name],
I received the document you sent over for my signature. Before I take this to be notarized, I noticed there is a clerical error on the form.
The form currently states the date of loss is [Wrong Date]. The correct date of loss, as reported initially, is [Correct Date].
Please update the system and generate a clean version of the form with the correct date. Once I receive the updated version, I will have it notarized and returned to you.
Thank you for your help keeping the file accurate.
⚠️ Warning: Never let anyone convince you to “just sign it anyway” and promise they will fix the error in the system later. Your signature validates the document exactly as it is printed. If it is wrong, do not sign it.
The Notary Process: Practical Steps for Claimants
Most of these documents require a notary public to witness your signature. This adds a layer of logistical friction, but it is a necessary step for the paper trail. The notary is not verifying that your roof is damaged; think of it as identity verification, rather than damage verification. They are simply acting as a state-licensed witness to confirm that the person signing the document is actually you.
When you go to the notary, you must bring the entire document package so they can see the complete context. Bring every page of the form, plus any exhibits or estimates that the form specifically references. Bring your valid, unexpired government identification. And most importantly, wait to sign the document until you arrive, because the notary must physically watch you sign the paper.
Once you sign and the notary applies their seal or stamp, you need to do a quick visual check. Make sure their ink stamp does not cover up important text on the form, like your name or the final dollar amounts. A smeared or illegible notary stamp can sometimes cause the document to be rejected by the mailroom intake team.
The Keep-Copy Rules and File Naming
This is where strong organizational habits pay off. The moment you leave the notary, you are holding the only original copy of a critical piece of evidence. You cannot simply drop it in a mailbox and hope for the best.
Before you mail anything, you must create a high-quality digital backup. If you have a scanner at home, use it. If not, go to a local print shop and have them scan it to a PDF file on your USB drive. When you scan it, make sure you scan it in color. A color scan proves that the blue ink of your signature and the stamp of the notary are original markings.
Once you have the digital file, you need to name it clearly. Do not leave the file name as “Scan00192.pdf”. You want a file name that tells you exactly what it is, without having to open it. I highly recommend using a standardized format for all your files, which you can read more about in our master guide to building a property claim documents checklist.
For this specific document, a clean file naming convention looks like this:
YYYY-MM-DD_Signed_Sworn_Statement_Jane_Doe.pdf
Use the date you actually signed the document at the front of the file name. Save this file in your primary digital claim folder. You now have permanent proof of exactly what the document looked like the minute it left your hands.
Common Mistakes When Submitting Formal Proofs
Even if the document is filled out perfectly, the submission process itself is full of traps. I see files stall out constantly not because the paperwork was wrong, but because the physical delivery failed or the digital upload was corrupted.
One common mistake is separating the exhibits. If your sworn statement references a 15-page repair estimate as “Exhibit A,” you must mail that 15-page estimate in the exact same envelope as the signed form. Do not assume they already have the estimate on file. In operations, documents are processed as complete packets. If the cover sheet says an exhibit is attached, and the intake scanner does not find it in the envelope, the entire packet is often flagged as incomplete.
Here is a breakdown of how to structure your submission to avoid intake errors:
| Item Order | What to Include | Purpose in the File |
|---|---|---|
| Top Page | A brief cover letter | Lists your claim number clearly and states exactly what is enclosed in the envelope. |
| Second Page | The original, signed, notarized form | The core legal requirement. |
| Following Pages | All referenced exhibits or estimates | Provides the detailed data that the form summarizes. Staple or clip these directly behind the form. |
What to Do If the Deadline is Tight
Sometimes, these forms arrive with a very aggressive return deadline. If you are struggling to schedule a notary in time, panic is not the solution—communication is.
If the deadline is approaching, email your contact to request an extension. More importantly, ask them to clarify what date actually counts: is it the date the envelope is postmarked by the post office, or the date it physically lands on their desk? To minimize your risk of being flagged as late, always email your color scan of the notarized document before the deadline hits, explicitly noting that the hard copy is currently in the mail.
A Clean Submission Scenario
Let’s look at how a highly organized person handles this final step. Imagine you have verified the form, visited the notary, and scanned your color copy. Now it is time to send it back.
Instead of just dropping it in a standard mailbox, you take it to the post office. You send the physical packet via certified mail with a return receipt requested. This provides you with a tracking number and a physical signature proving exactly when the mailroom received your envelope.
You do not stop there. As soon as you get home from the post office, you open your email. You draft a short message to your contact, attach the color PDF scan you made earlier, and include the certified mail tracking number in the body of the email. You have now created a digital timestamped record of the submission, provided them with an immediate advance copy they can look at on their screen, and secured a physical tracking method for the hard copy.
That is what a highly reliable submission looks like. It significantly reduces the chance of the classic “we never received your paperwork” delay.
Final Actions: Locking Down Your Record
The process is not complete until you have confirmation that the file has been updated on their end. Waiting silently is never a good operational strategy. If you sent the physical mail on a Monday, and tracking shows it was delivered on Thursday, you should initiate a confirmation loop by the following Tuesday.
You want them to explicitly state, by email, that the document was received, reviewed, and accepted into the file. Do not call and ask. Use your email trail to force a documented response.
Here is the script you can use to close the loop on this task:
Hello [Adjuster Name],
I am writing to follow up on the notarized document packet I sent over last week. The tracking information shows the physical envelope was delivered to your mailroom on [Date of Delivery]. I also provided a digital PDF copy via email on [Date of Email].
Could you please reply to this email to confirm that the signed document has been successfully processed and added to my file?
If there is anything else you need from me to keep this moving, please let me know by email.
Thank you for your time.
💡 Pro Tip: Once you get that reply confirming receipt, print that email as a PDF and save it in the exact same folder as your scanned copy of the form. You now have the document, the proof of sending, and the proof of receipt all locked in one place.
❓ FAQ
🗣️ What exactly is a sworn statement in proof of loss?
It is a formal, usually notarized document where you officially declare the details of your claim, the date it happened, and the specific amounts involved. It serves as the locked-in, official record of your damages for the processing department.
🖋️ Do I always have to get this document notarized?
In most standard property claims, yes. The form itself usually includes a specific section at the bottom for a notary public to stamp and sign, acting as a state-licensed witness to your signature.
❌ What if I find a mistake on the form after I already signed it?
Do not use white-out or cross it out manually. Contact the person handling your file in writing, explain the error, and request that they generate a clean, corrected version of the form for you to sign and re-notarize.
📑 Do I need to attach all my physical receipts to this form?
Only attach documents that the form explicitly references. If the form says “See Exhibit A for estimate details,” you must attach that exact estimate. Do not overwhelm the packet with unreferenced receipts unless requested in writing.
⏳ What happens if I miss the deadline to send it back?
Deadlines are critical. Missing the required window to return this specific form is one of the most common reasons files are heavily delayed or closed administratively. Always confirm deadlines in writing and track your submission.
💻 Can I just sign it digitally on my computer and email it?
Generally, no. Because it requires a notary seal, you usually need to print it, sign it in physical ink in front of the notary, and return the original hard copy, though sending a digital scan as an advance copy is highly recommended.
📬 How should I mail the physical copy back?
Always use certified mail with a return receipt requested, or a tracked overnight courier service. You must have a physical tracking number and proof of delivery for this specific document.
🤔 Why did they ask me to fill out a second one?
This often happens if the scope of the damage changes significantly, if an initial mistake was found in processing, or if additional funds are being released later in the process. Ask for written clarification on why the new form was generated.
🛑 Should I sign it if I disagree with the dollar amount?
Never sign a formal document that you believe contains incorrect data. Request clarification in writing regarding the numbers. Ensure you understand exactly what the numbers represent before applying your signature.
👀 Who actually reads this document once I send it?
It usually goes past the field level and straight to the internal processing or compliance department. They audit the document to ensure the dates, names, and notary seals perfectly match the system before authorizing further file movement.
⚠️ Disclaimer: PropertyClaimChecklist.com provides practical guidance, process checklists, and example follow-ups to help you organize a property claim and move it forward. It is not policy language, claim documentation, legal content, or a substitute for your insurer's instructions. Always rely on your carrier's requirements and your actual policy terms for what must be submitted and how decisions are made.