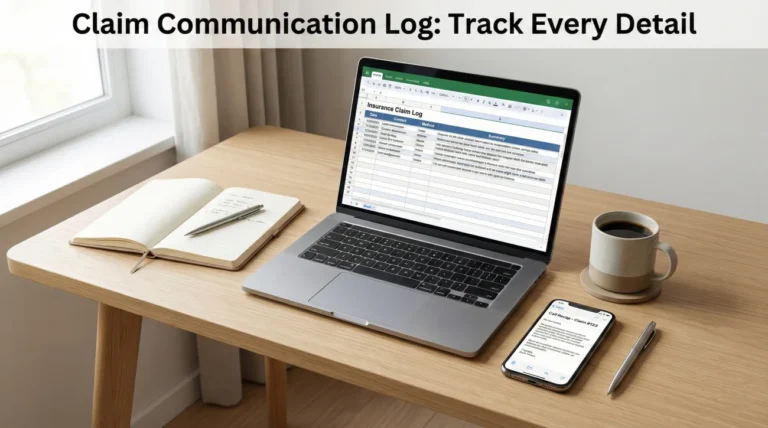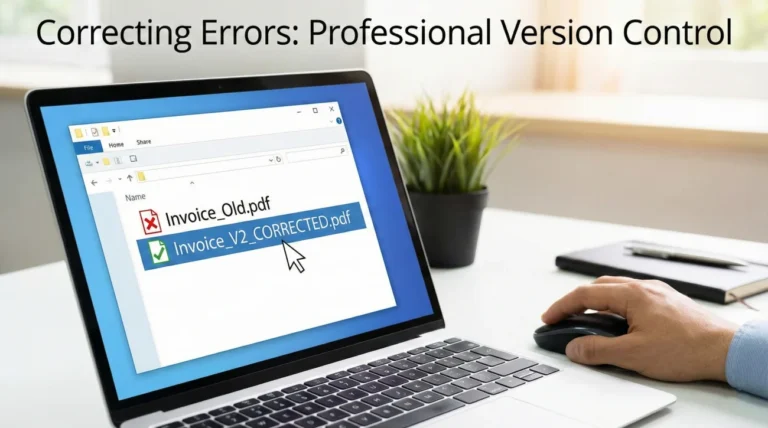
- The adjuster’s notes are not final until they are in the official claim file, which is why a written recap email is your best tool to prevent verbal agreements from being forgotten.
- A proper post inspection follow up email should be a polite, factual bulleted list of the specific damages you both looked at during the walk-through.
- Never rely on verbal confirmation for next steps. Always end your recap by asking for a written timeline of when you can expect the itemized estimate.
The Critical Window Right After the Adjuster Leaves
When the field adjuster finally packs up their clipboard, puts their ladder away, and drives off your property, it is completely normal to feel a massive sense of relief. You just spent an hour or two pointing out every water stain, cracked tile, or damaged shingle. They nodded, they took photos, and they told you they would get the report over to the desk team. It feels like the hard part is over.
In my experience handling the operational side of claims, this exact moment is where the most frustrating delays begin. You think the information is safe. You assume the adjuster remembers every detail you discussed. But the reality of field work is much different.
Field adjusters often visit three, four, or even five properties in a single day. By the time they sit down to type up their notes at a hotel desk that evening, the details of your living room ceiling can easily blend together with the details of the house they visited three zip codes away. If they forget to write down that you both looked at the warped baseboards in the hallway, those baseboards do not exist in the official claim record.
Key Point: If a conversation happens verbally during an inspection, it is invisible to the insurance company’s system. You must convert that conversation into a written record.
This is why sending a post inspection follow up email is not just a polite courtesy. It is a fundamental operational habit. Your goal is to gently and professionally document what was seen, what was discussed, and what the agreed-upon next steps are. When you do this correctly, you protect your timeline from unnecessary stalls.
Why Verbal Agreements Disappear from the File
I often see homeowners deeply frustrated because an adjuster looked them in the eye and said, “Yes, I see the damage behind the cabinet,” but when the official estimate arrives a month later, the cabinet is completely missing from the paperwork.
The natural reaction is to think the insurance company is playing games. While misunderstandings do happen, the most common reason for this gap is simple human error mixed with a chaotic workflow. The adjuster took a photo, but the photo came out blurry. They made a mental note, but their phone rang during the inspection and they forgot to write it down. The person who eventually writes the estimate back at the office is often not the same person who walked through your home.
To keep your file accurate, you have to take ownership of the paper trail. A good post-inspection email acts as an anchor. It gives the desk adjuster something to cross-reference when they are building your estimate. If your email clearly states that you both inspected the guest bathroom flooring, the desk team is much more likely to ask the field adjuster for those specific photos rather than just ignoring the room entirely.
⚠️ Warning: Never wait a week to send this email. The best time to send your recap is the same afternoon or the morning immediately following the inspection, while the property is still fresh in everyone’s mind.
The Recap Framework: Building Your Message Step-by-Step
Writing this email does not require complicated language. In fact, the simpler and more factual your email is, the better it works. You do not need to use aggressive words, and you absolutely should not try to negotiate or guess the value of the damage. You are simply acting as a reliable note-taker.
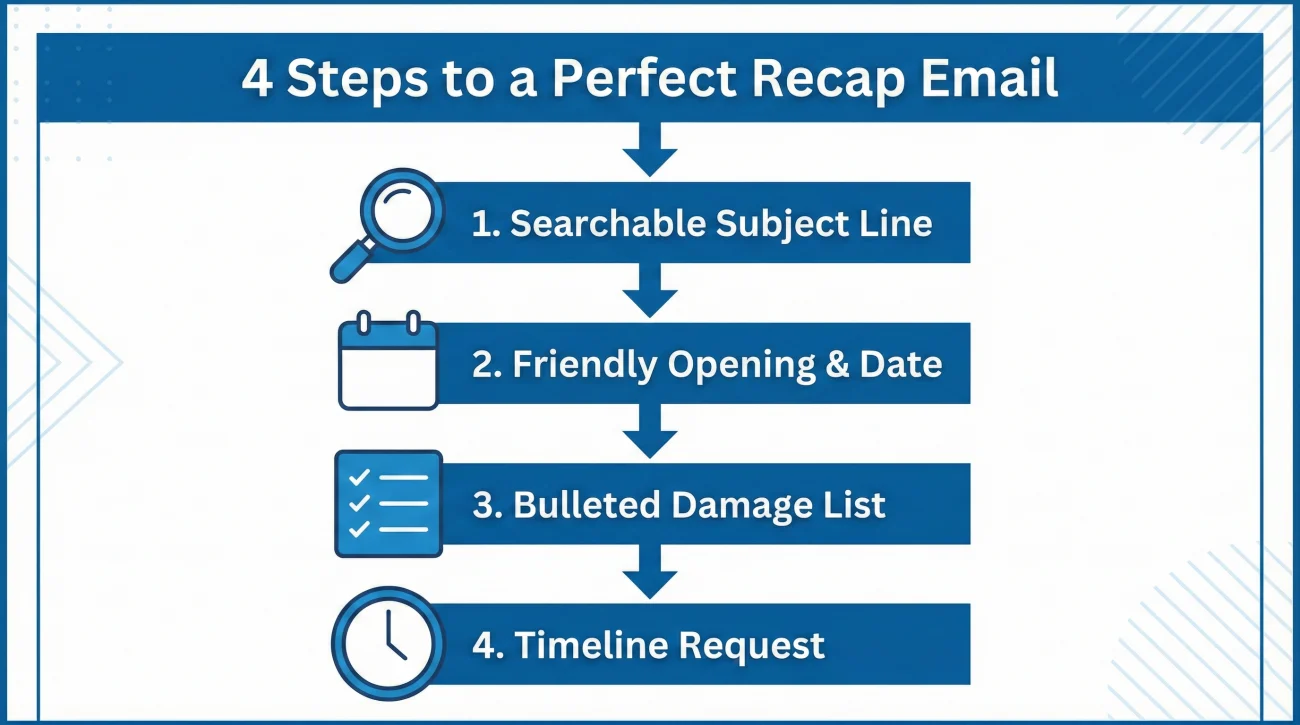
Step 1: A Clear, Searchable Subject Line
Claims departments handle thousands of emails a day. If your subject line is just “Thank you” or “My inspection”, your message will likely get buried or attached to the wrong file. You need to make it impossible for the routing system to lose your message.
Checking in after the visit today
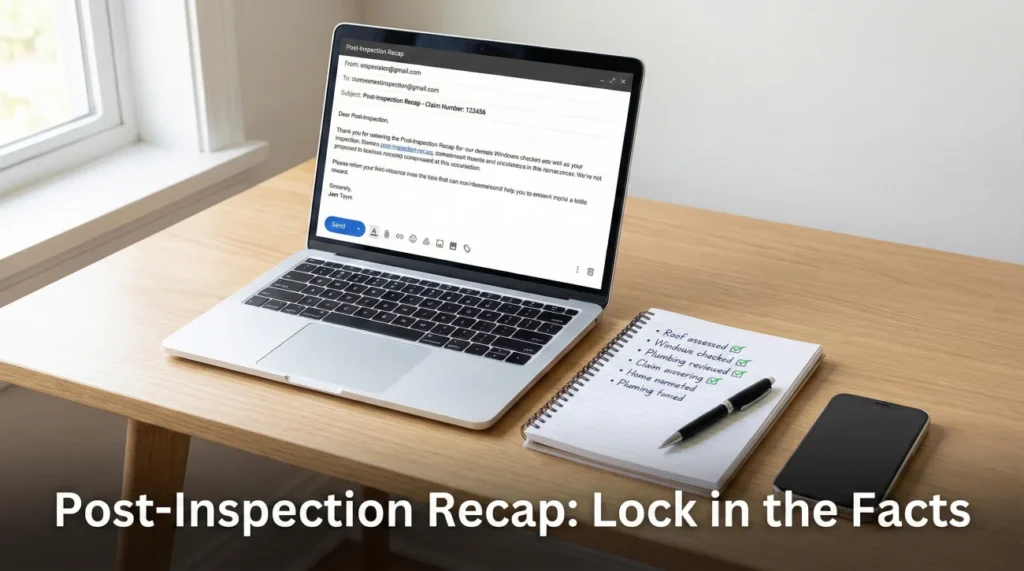
Claim #12345678 – Smith – Post-Inspection Recap and Next Steps
Step 2: The Friendly Opening and Date Confirmation
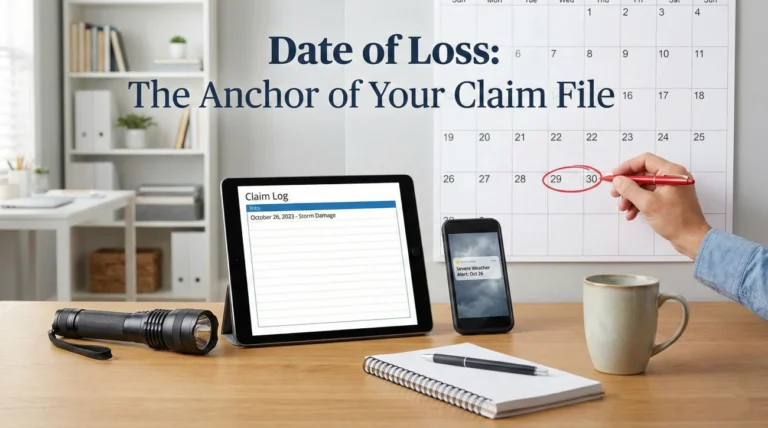
Start by thanking the adjuster for their time. This sets a collaborative tone. Then, immediately document the exact date and time the inspection took place. This proves that the physical walk-through actually occurred on schedule, which helps lock in your claim timeline.
Step 3: Bulleting the Damaged Areas Discussed
This is the core of your email. You do not need to list every single nail or scratch. Instead, list the major areas or specific items that the adjuster spent time looking at, especially items they acknowledged were damaged. Keep it brief and organized by room or area.
For example, instead of writing a massive paragraph about the water running down the wall, simply write: “Guest bedroom: Noted water stains on the east wall and bubbling paint on the baseboards.”
Step 4: The Closing and Next Steps Request
Never end an email with “Let me know if you need anything.” That leaves the ball in nowhere land. You must ask a direct question that requires a specific, date-based answer. You want to know when the next milestone will happen.
[Factual summary of visit] + [List of areas reviewed] + [Request for written timeline]
The 7-Point Recap Quality Check
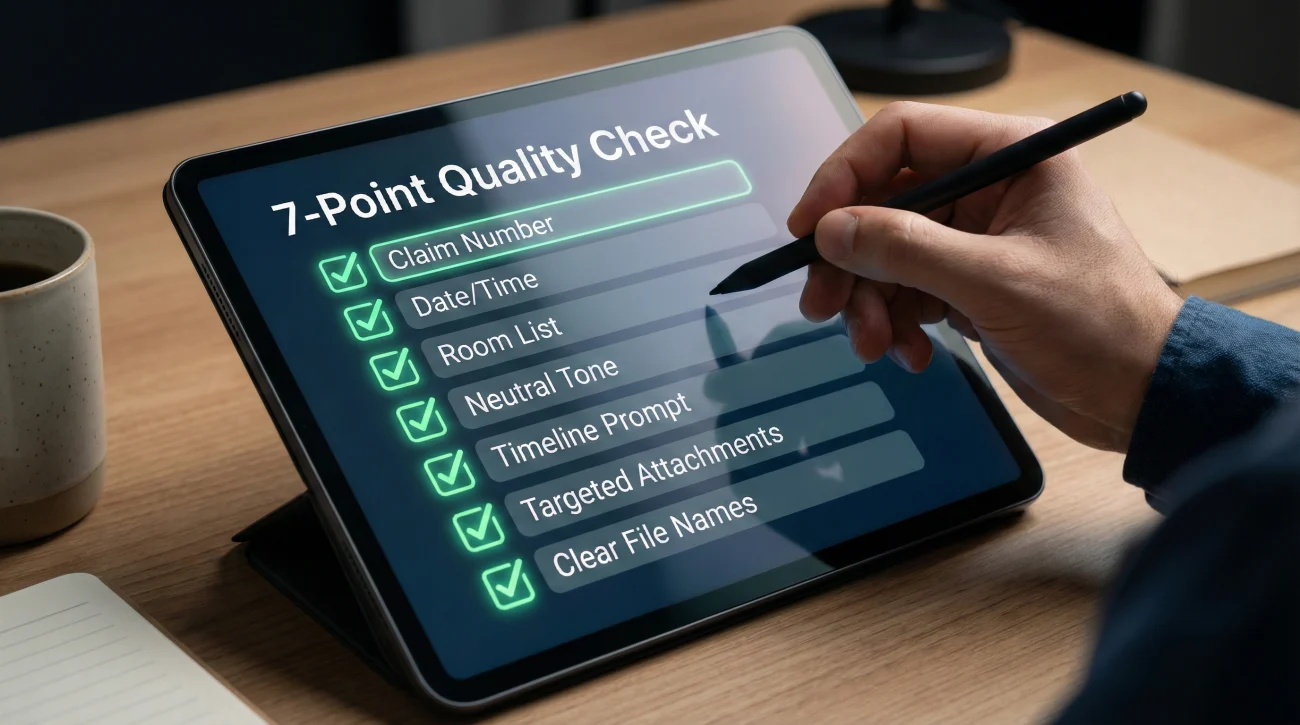
Before you hit send, run your draft through this quick checklist. In claims operations, a well-formatted email isn’t just polite; it literally dictates how fast your file is processed. Desk adjusters are evaluated on how efficiently they can move files off their desk. If your email is structured like a clean, factual checklist, they can cross-reference it with the field notes in two minutes. If it reads like a rambling, emotional story, it gets pushed to the bottom of the pile.
Ensure your follow-up meets these operational standards:
- ✅ Claim number: Included in the subject line (this prevents the email from sitting in an unassigned queue).
- ✅ Date and time: Clearly stated in the opening sentence to lock in the timeline.
- ✅ Room list: Bulleted logically, ideally in the exact order you walked through the house with the adjuster.
- ✅ Tone check: Neutral, factual, and strictly devoid of arguments about policy coverage.
- ✅ Timeline prompt: Ends with one specific question about the next measurable milestone.
- ✅ Attachments: Maximum 2 to 3 targeted items, and only if absolutely necessary to prove a newly discovered issue.
- ✅ File names: Any attached photos are named clearly (e.g., Roof_South_MissingShingle.jpg) rather than default camera numbers.
By treating this recap email like a professional cover sheet rather than a personal letter, you remove the friction that usually slows down the review process.
Where to Send It If You Do Not Have the Adjuster’s Email
A common hurdle homeowners face is the “ghost adjuster.” Many independent field adjusters (IAs) use closed portal systems and simply do not hand out direct email addresses or direct phone numbers. Because they are hired contractors—not official employees of the insurance company—their communication loop can sometimes feel like a black hole.
If this happens, do not skip the recap step. Silence does not mean the paper trail stops. Send your email directly to the main claims inbox provided by your insurer. Put your claim number in the subject line, and instruct the receiving agent: “Please add this post-inspection recap to the official file notes and route a copy to the assigned desk adjuster.”
If your insurer relies entirely on an online dashboard or a mobile app, copy and paste your recap directly into the portal’s message center. However, you must apply one crucial operational rule here: take a screenshot of the message inside the portal before you hit submit, and take another one showing it in your “Sent” history. Portals glitch, undergo maintenance, and sometimes messages vanish. Your screenshot serves as your undeniable proof of submission.
Three Scripts You Can Use After the Inspection
Staring at a blank screen can be stressful when you are worried about saying the wrong thing. Below are three variations of the post inspection follow up email. Choose the one that best fits how your actual walk-through went. You can copy these, fill in your specific details, and send them directly.
Script 1: The Standard Recap
Use this script if the inspection went smoothly, the adjuster was professional, and you just want to lock in the facts of the visit.
Hello [Adjuster Name],
Thank you for taking the time to inspect my property today, [Date of inspection]. I appreciate you walking through the site with me.
To keep my own records organized, I want to confirm the main areas of damage we reviewed together during the walk-through:
– The roof, specifically the missing shingles on the south side.
– The water damage on the ceiling in the primary bedroom.
– The warped hardwood flooring in the upstairs hallway.
Could you please reply and let me know the estimated date when your itemized estimate will be completed and uploaded to the file?
Thank you again for your help.
Best regards,
[Your Name]
[Your Phone Number]
Script 2: The “Missed Item” Recap
Sometimes an adjuster leaves, and ten minutes later you realize you both completely forgot to look at the water damage inside the garage. Do not panic. Use this script to officially add it to the record immediately.
Hello [Adjuster Name],
Thank you for inspecting the property today. I am writing to recap our visit and to provide documentation for one area we missed.
During the walk-through, we reviewed:
– The wind damage to the back fence.
– The broken window in the living room.
After you departed, I realized we did not look inside the detached garage. I have found water pooling near the back wall. I have attached three clear photos of this specific area to this email so you can add it to your file. If you need to schedule a brief reinspection for this specific area, I am available this week.
Please confirm you have received these photos, and let me know when I can expect the initial estimate.
Thank you,
[Your Name]
Script 3: The Timeline Request (If they were vague)
If the adjuster rushed through the inspection and left without giving you any idea of what happens next, use this script to force clarity.
Hello [Adjuster Name],
Thank you for completing the field inspection today, [Date].
We looked at the kitchen water damage and the ruined cabinetry. Since we did not have a chance to discuss the timeline before you had to leave for your next appointment, I want to make sure I understand the process from here.
Could you please reply with the next steps required for this claim, and an estimated date for when the desk team will review your report?
If you need any additional documents from me to keep this moving, please let me know in writing.
Best,
[Your Name]
What to Do If the Adjuster Ignores Your Email
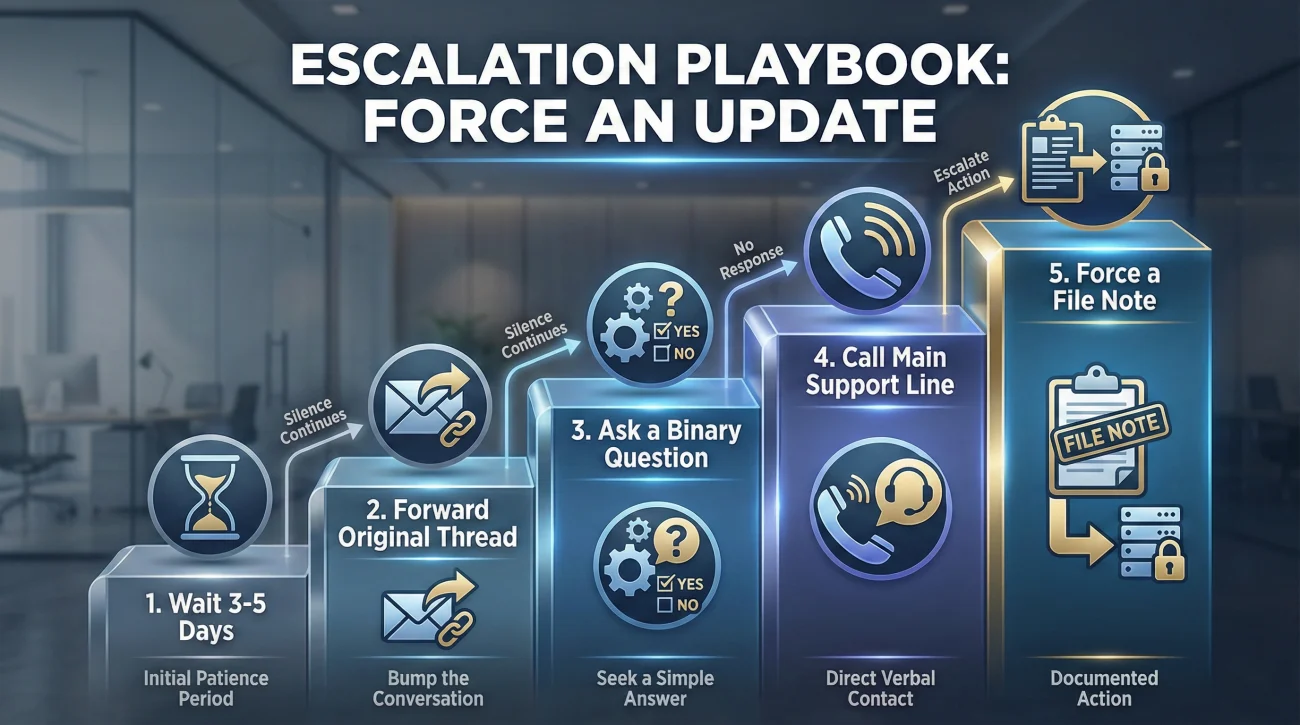
If you send your perfectly crafted recap and hear absolutely nothing back, do not let the file sit idle for weeks assuming they are working on it behind the scenes. In the claims world, silence usually means your file is stuck in a pending queue, not that it is actively being approved. Adjusters carry massive caseloads, and it is up to you to keep your file visible.
If you face a wall of silence, follow this simple escalation playbook to force an update without sounding combative:
- 1. Observe the waiting period: Wait 3 to 5 business days. Adjusters need a few days to process field reports, so immediate follow-ups just create noise.
- 2. Keep the thread intact: Do not start a new email. Forward your original recap email back to them so the thread (and the timestamp of your first attempt) stays intact.
- 3. Ask a single, binary question: Keep it incredibly brief. Write: “Hello, I am checking in to see if you received this recap below, and if there is a timeline update for the estimate?”
- 4. Escalate to the main line: If they are still silent after another 48 hours, call the main claim support line. Do not leave another voicemail for the specific adjuster.
- 5. Force a file note: Ask the phone representative to open your file, verify that your sent email is visible in their system, and ask them to formally “ping” the desk adjuster on your behalf.
What to Attach to Your Follow-Up Email
The post-inspection email is an excellent opportunity to attach a small, highly targeted selection of documents. However, this is not the time to dump 150 unorganized photos into an email thread. Corporate email servers routinely strip out heavy .zip files or HEIC image formats from iPhones, meaning your adjuster might receive a blank email without you ever knowing.
You want to provide exactly what the adjuster needs to verify the file, and nothing more. If you must attach photos, take an extra minute to name them clearly (e.g., Smith_Claim123_GuestBath_Baseboard.jpg) instead of leaving them as IMG_9942.jpg. In my experience, desk adjusters love this because they can cross-reference your specific photos with the field notes instantly.
- ✅ Attach: The invoice for emergency mitigation (like a water extraction company) if they requested it.
- ✅ Attach: 2 or 3 wide-angle photos of any damage that was discovered right after they left.
- ✅ Attach: Your own inventory list of damaged contents, if it is fully completed and ready for review.
- ❌ Do Not Attach: Dozens of blurry, close-up photos of drywall that the adjuster already photographed.
- ❌ Do Not Attach: External links to cloud drives unless the insurer has explicitly requested them, as their firewalls often block these links.
Building a habit of clean, organized attachments is a massive part of maintaining control over your file. If you are unsure how to package your broader evidence, I highly recommend reviewing our complete property claim documents checklist. It will show you exactly how to separate the items you keep from the items you attach, ensuring your claim packet stays professional from start to finish.
Common Mistakes That Delay the File After an Inspection
In day-to-day claims ops, the fastest wins usually come from avoiding simple unforced errors. When the post-inspection phase breaks down, it is rarely because of a massive legal dispute. It usually breaks down because of poor communication hygiene. Here are the most common mistakes I see, and how you can avoid them.
| The Mistake | Why It Delays the Claim | The Better Approach |
|---|---|---|
| Waiting a week to send the recap. | The adjuster has already written and submitted their report based on their memory. Making changes now requires an official revision. | Send the email the same afternoon or the very next morning before their report is finalized. |
| Arguing about coverage in the email. | The field adjuster usually does not have the final say on coverage. Arguing makes the file combative without solving the problem. | Stick entirely to the physical facts. “We looked at the water line on the wall.” Let the desk team handle policy interpretation. |
| Failing to ask for a specific date. | Writing “Let me know what happens next” gives the insurer permission to take as long as they want to reply. | Always ask for a specific timeline marker: “When can I expect the itemized estimate to be uploaded?” |
❌ Note: Another frequent mistake is assuming that because the adjuster was friendly, the paperwork will automatically be perfect. Friendliness is great, but professionalism requires a written paper trail.
Realistic Mini-Scenarios: How Good Recaps Save Claims
To see how this works in practice, let’s look at two common operational scenarios. Notice how the simple act of documentation prevents confusion down the line.
Scenario 1: The Water Loss and Mold Concern
A pipe bursts and damages the hallway baseboards. During the inspection, the adjuster touches the baseboards and says verbally, “They are still a bit wet, but let’s see if they dry out before we replace them.” The homeowner wisely sends a recap email that afternoon: “We reviewed the wet baseboards in the hallway; you noted we will wait to see if they dry before determining replacement.” A week later, visible mold appears. Because the homeowner documented the timeline of the wet baseboards officially, the desk adjuster processes the supplement immediately instead of questioning if the mold is from a pre-existing leak.
Scenario 2: The Wind Storm and Interior Leak
After a severe storm, an adjuster inspects the roof and confirms hail hits. The homeowner then points out a new water stain on the living room ceiling. The adjuster nods and says, “Probably related to the roof damage.” The homeowner follows up with an email: “Confirmed wind/hail damage to the roof; reviewed the corresponding water stain on the living room ceiling.” When the desk team reviews the file, they easily link the interior leak directly to the covered storm event, preventing the ceiling damage from being mistakenly coded as an unverified, separate maintenance issue.
Final Thoughts on Protecting Your File
The period immediately following an inspection is a fleeting window of opportunity. The information is fresh, the photos are recent, and the adjuster is actively working on your file right then and there. By taking just ten minutes to write a calm, factual summary of the visit, you step out of the role of a passive bystander and into the role of an organized, proactive advocate for your property.
You do not need to be a claims expert or use intimidating legal jargon to do this well. You just need to be disciplined about communication hygiene. Keep your tone strictly neutral, stick exactly to the physical areas you reviewed together, and always close by politely asking for the next date on the timeline. If you build this simple post-inspection habit, you will drastically reduce the chances of your claim stalling in the dark due to missing notes or “forgotten” conversations.
❓ FAQ
⏱️ How long should I wait to send a follow-up email after the inspection?
You should send it the same afternoon or the morning immediately following the visit. You want your recap in their inbox before they finalize and submit their internal report.
📸 Should I attach my own photos if the adjuster already took some?
Generally, no. If you both looked at the same damage and they took clear photos, do not flood the email with duplicate pictures. Only attach photos of damage you realized was missed after they left.
🗣️ What if the adjuster made a verbal promise during the walk-through?
Verbal promises do not exist in claims operations. If they promised to cover something specific or waive a requirement, you must politely restate that in your recap email to get it on the written record.
📝 Do I need to send a recap if the inspection was very short?
Yes. Even a ten-minute inspection needs a paper trail. Simply document the date, time, and the brief areas that were observed to establish that the visit happened.
🗂️ How should I format the email subject line for my follow-up?
Always start with your official claim number, your last name, and a clear description. Example: “Claim #12345 – Smith – Post-Inspection Recap.”
🙈 What happens if I realize the adjuster missed a damaged room?
Do not panic. Immediately take wide-angle and close-up photos of the missed room, attach them to your recap email, and clearly state that this area was accidentally bypassed during the walk-through.
📆 How do I politely ask when the estimate will be ready?
Keep it direct. Write: “Could you please reply with an estimated date of when the itemized scope of work will be uploaded to my file?”
📎 Is it safe to send links to a cloud drive instead of attachments?
In many cases, it is not. Insurance company firewalls routinely block external links to Google Drive or Dropbox. Whenever possible, use standard PDF or JPEG attachments directly on the email.
✍️ Do I need a lawyer to write the post-inspection email for me?
No. A standard post-inspection email is simply a factual recap of a meeting. You are just listing what was looked at and asking for the next step. It does not require legal language.
🔄 What if the adjuster doesn’t reply to my post-inspection recap?
Wait 3 to 5 business days, then forward your original email to the desk adjuster or the main claim email address. State that you are following up on your previous recap and requesting a status update.
⚠️ Disclaimer: PropertyClaimChecklist.com provides practical guidance, process checklists, and example follow-ups to help you organize a property claim and move it forward. It is not policy language, claim documentation, legal content, or a substitute for your insurer's instructions. Always rely on your carrier's requirements and your actual policy terms for what must be submitted and how decisions are made.