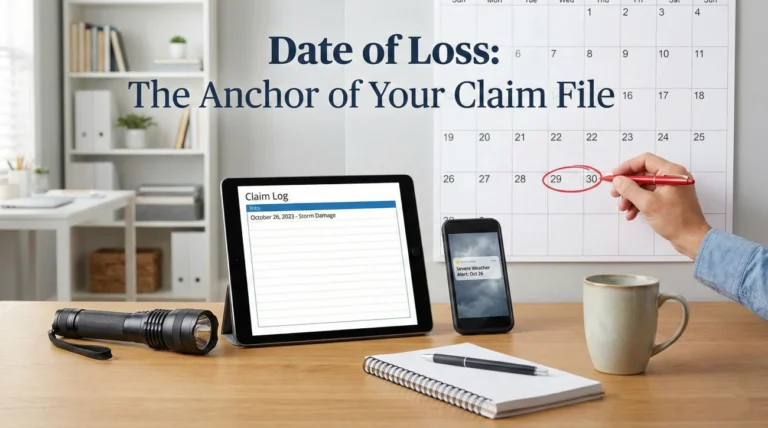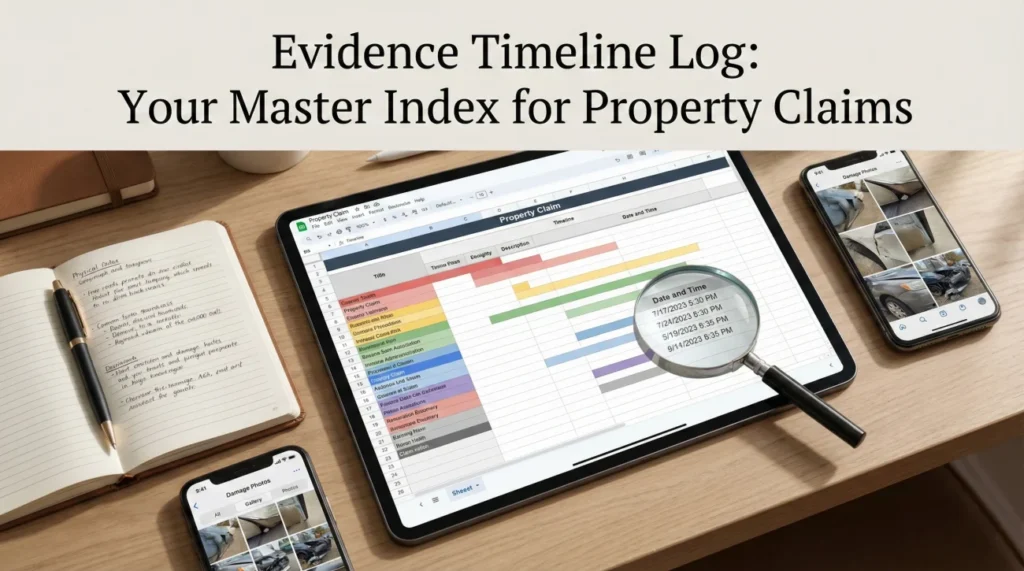
- An evidence timeline log is a simple chronological record that proves exactly when damage occurred, when cleanup started, and when temporary repairs were made.
- Do not write paragraphs. Keep entries restricted to dates, times, brief factual actions, and reference numbers for your photos.
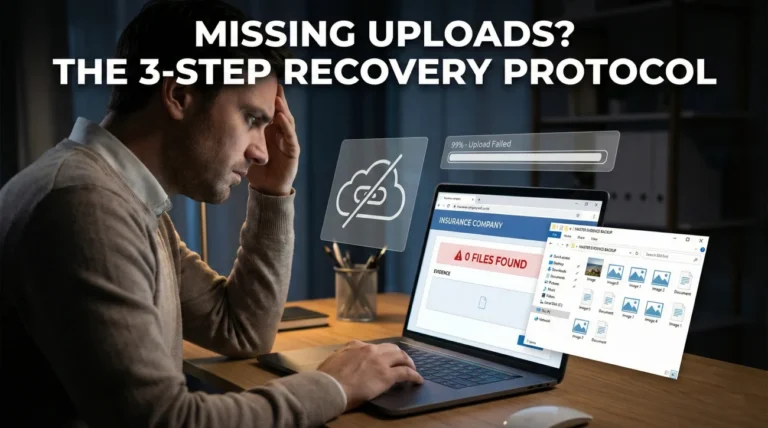
- Digital photo metadata can be changed or removed during compression and uploads, making a written timeline your most reliable backup.
- Update your log daily during the active phases of your claim to prevent memory gaps and avoid contradictory statements later.
The Problem With Floating Evidence
When property damage happens, the first few days are a blur of adrenaline, phone calls, and immediate cleanup efforts. You take dozens of photos, you move wet items out of the living room, and a crew might come in to place tarps or set up drying fans. In the moment, every detail feels unforgettable. But two weeks later, when someone asks exactly what day the drywall was removed or when the secondary leak started, that perfect memory often fragments.
In my experience handling claim documentation operations, I see this exact scenario play out constantly. A property owner will submit a folder of two hundred damage photos. The photos show water on the floor, then missing baseboards, then a patched pipe. But without a clear chronological map, those photos are just floating evidence. A reviewer cannot easily tell if the baseboards were removed on day one to stop the water or on day five by a mitigation crew.
This is why you need an evidence timeline log. It is not a diary of how stressed you feel, and it is not a transcript of your phone calls. It is a highly structured, simple tracking sheet that anchors your physical evidence to specific dates and times. When you build this log correctly, it reduces guesswork for anyone reviewing your file. You project clear organization, which can translate to fewer follow-up questions. While the exact intake process varies by carrier, presenting a clear chronology always helps.
I want to walk you through exactly how to build an evidence timeline log, what fields are strictly necessary, and how to maintain it without turning it into a full time job.
Why A Written Timeline Matters More Than You Think
Many people assume that because their smartphone captures the date and time of a photo, they do not need to write anything down. This is a common operational trap. When you upload photos to a portal or email them, the underlying metadata (the hidden data that stores the date and time) is frequently compressed, stripped, or changed or removed during the upload process.
If that happens, your digital proof of timeline vanishes. Your written timeline log acts as the master index that protects the integrity of your sequence of events. Furthermore, not every important event has a corresponding photo. You might notice a change in the property condition, or a mitigation team might arrive and start working before you have a chance to take a picture. The log captures the spaces between the photos.
Key Point: Your timeline log serves as the backbone of your entire documentation package. It organizes chaotic events into a predictable, easy to read format that outside reviewers are trained to understand.
When I look at a well organized file, the presence of a timeline log immediately signals that the homeowner is tracking facts diligently. It prevents a scenario where you accidentally state two different dates for the same event simply because you were tired when asked. Consistency is critical, and a log ensures your story never changes.
The Core Framework: Essential Fields for Your Log
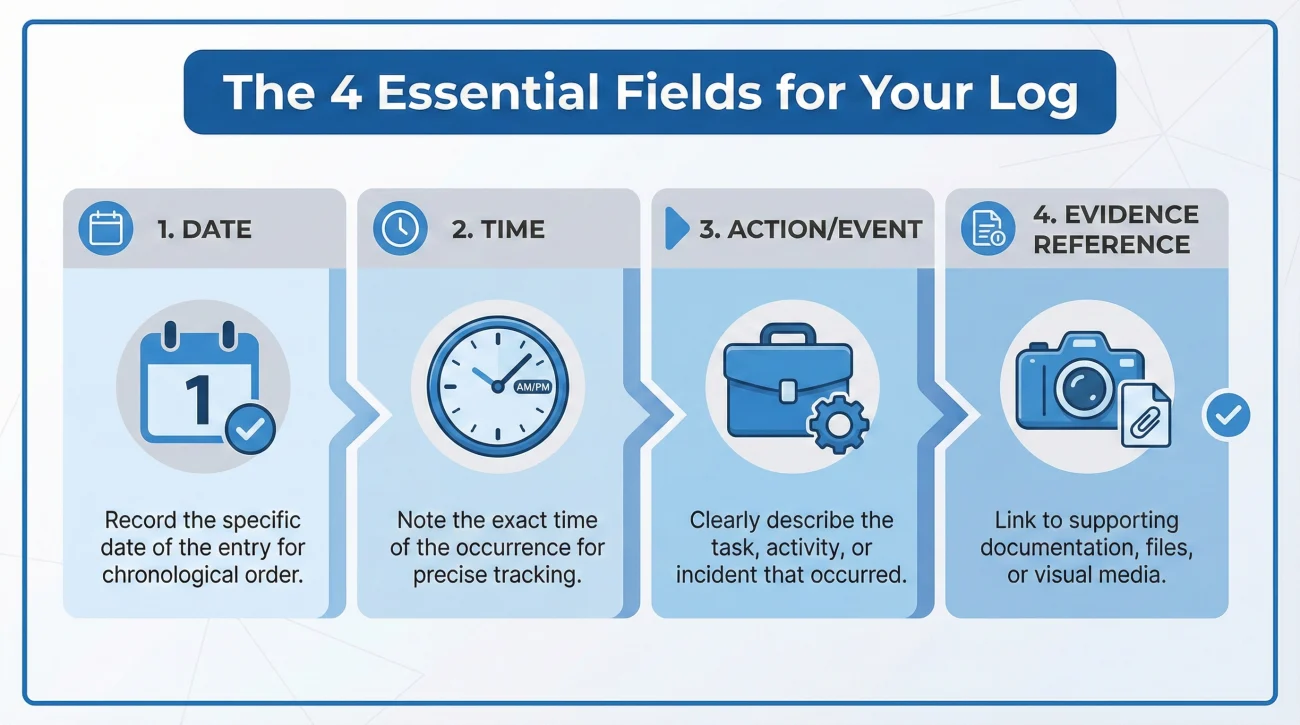
The biggest mistake you can make with an evidence timeline log is overcomplicating it. If you try to write a novel for every entry, you will abandon the system by day three. You only need four specific fields to make this tool highly effective.
You can create this log in a spreadsheet, in a standard notebook, or in a simple word processing document. The format matters much less than the consistency of the data you enter.
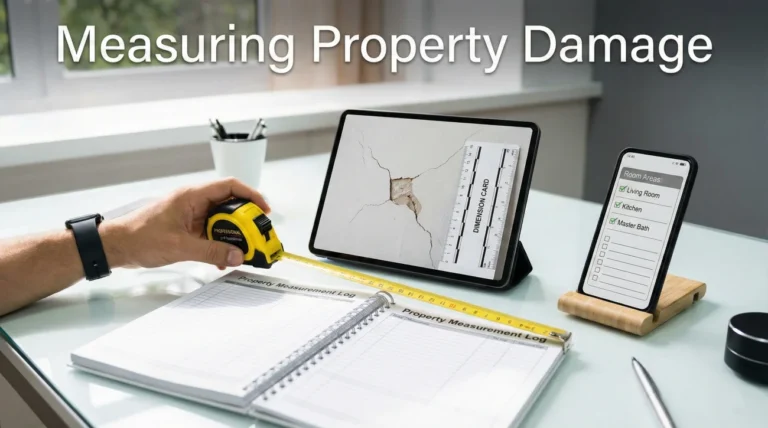
Date | Time | Action or Event | Evidence Reference
[MM/DD] | [00:00 AM] | [Brief physical fact] | [Photo ID / Invoice number]
| Date | Time | Event / Action Taken | Evidence Reference |
|---|---|---|---|
| Oct 12, 2023 | 08:15 AM | Initial discovery of water pooling in kitchen. | Photos IMG_001 to IMG_005 |
| Oct 12, 2023 | 09:30 AM | Main water valve shut off to stop flow. | Photo IMG_006 (Valve off) |
| Oct 13, 2023 | 11:00 AM | Mitigation crew arrived; began extracting water. | Video VID_001, Invoice #402 |
Breaking Down the Required Columns
Let us look at why each of these specific columns is necessary for a complete log.
Date and Time: Always include the exact date. If the event is ongoing (like a storm), log the specific time you noticed a change in the damage. Precision here prevents confusion about the sequence of events, especially if damage worsens over a period of hours.
Event or Action Taken: Keep this to one sentence. Stick to the physical facts of what occurred or what action was taken regarding the property. Examples include “Discovered roof leak in master bedroom,” “Moved electronics to dry room,” or “Contractor installed temporary roof tarp.”
Evidence Reference: This is the most crucial column. This is where you link the real world event to your physical proof. If you took photos of the broken pipe, list the file names here. If you kept a receipt for emergency supplies you bought to stop the damage, note the receipt number here. This column weaves your timeline and your evidence pack together.
“Tuesday afternoon, the water was getting everywhere so we finally got the plumber out and he fixed it and we took pictures.”
“Oct 14, 2:00 PM: Emergency plumber arrived, repaired under-sink pipe. Photos IMG_40 to IMG_45. Plumber Invoice #889.”
Phase One: Logging the Initial Discovery and Capture
The first phase of your timeline log covers the discovery of the damage and your initial evidence capture. This is usually the most chaotic window of time, but it is also the most important phase to get right. Reviewers often scrutinize the timeline of discovery to understand how the event unfolded and whether immediate action was taken.
When you discover damage, your very first entry should reflect that exact moment. You do not need to know the cause of the damage to log it. You simply state what you found.
    Example Log Entries for Initial Discovery:
    - 10/05, 06:00 AM: Found tree branch penetrating living room window. Wind still active.
    - 10/05, 06:15 AM: Photographed interior damage before moving furniture (Photos 1-12).
    - 10/05, 06:45 AM: Moved sofa and television to dry hallway to prevent further damage.
Notice how the log entries focus entirely on physical realities. There is no speculation about the cost, and there are no complaints. By logging the exact time you moved the sofa to safety, you are building a documented timeline of your efforts to protect the property from further harm. This is a practical habit that shows responsibility.
If the damage is ongoing, like a severe weather event that continues over several days, you do not need to spam your log with hourly updates. Only log measurable changes. For example, log when the water first enters, and then log again only if the leak expands to a new room or a ceiling suddenly collapses.
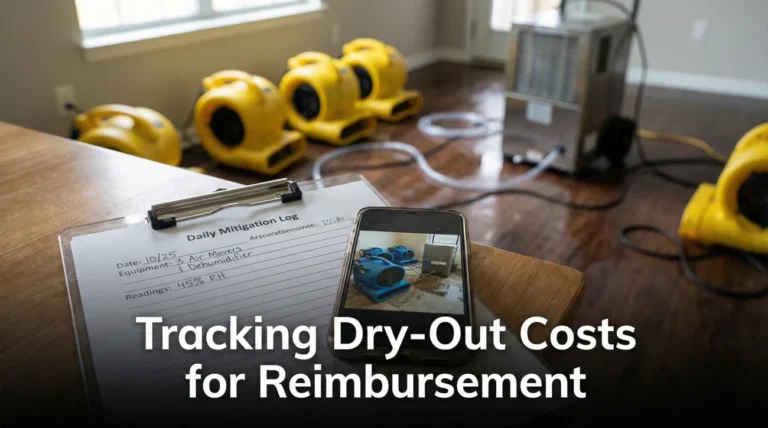
Phase Two: Tracking Cleanup and Mitigation
Once the initial shock passes, the cleanup phase begins. This might involve you throwing away ruined carpet, or it might involve a professional mitigation company bringing in heavy equipment. In either scenario, the condition of the property is changing rapidly. Your evidence timeline log must capture these transitions.
If you do not log when mitigation starts, you create a gap in your documentation. A reviewer might look at photos from day one (flooded room) and photos from day four (bare concrete floor) and wonder what happened in between. Your log bridges that gap.
⚠️ Warning: Whenever possible, and assuming the site is safe, avoid letting a mitigation crew begin demolition or removal of materials without first logging their arrival and taking “before cleanup” photos to reference in your timeline.
If a crew arrives, your log should look something like this:
- ✅ Nov 2, 09:00 AM: Mitigation crew arrived on site.
- ✅ Nov 2, 09:15 AM: Took wide angle photos of all affected rooms before crew began work (Photos 50-65).
- ✅ Nov 2, 04:00 PM: Crew departed. Baseboards and wet drywall removed. Fans placed.
- ✅ Nov 2, 04:15 PM: Took photos of room condition after crew left (Photos 66-75).
This level of tracking removes any ambiguity about who altered the scene and when it happened. In daily claims operations, a timeline like this is widely accepted by reviewers because it relies purely on observable facts.
Phase Three: Documenting Temporary Repairs
Temporary repairs are actions taken strictly to secure the property and prevent the damage from getting worse. This includes things like tarping a roof, boarding up a broken window, or capping a leaking pipe. Temporary repairs are a critical part of the property timeline, and they must be logged distinctly from permanent repairs.
I often see people confuse temporary stabilization with the final fix. Your log should make it incredibly clear that an action was a stopgap measure. If you simply write “fixed the roof,” a reviewer might assume this is the final permanent repair date and misinterpret the rest of your file.
When logging a temporary repair, always include the phrase “Temporary repair” or “Emergency stabilization” in the action column. For example, instead of writing “Fixed the roof,” you should write “Installed temporary emergency tarp over roof penetration.” Then, in the reference column, you must link the photos of the temporary repair and any receipts for materials like plywood, tarps, or emergency labor.
By clearly marking these actions on your timeline, you provide a clean historical record showing exactly what dates the property was exposed to the elements and what date it was secured.
Common Timeline Mistakes I See Constantly
Building an evidence timeline log is simple, but maintaining it properly requires discipline. Because property damage is stressful, it is easy to fall into bad habits that compromise the integrity of your log. Here are the most common pitfalls you need to avoid.
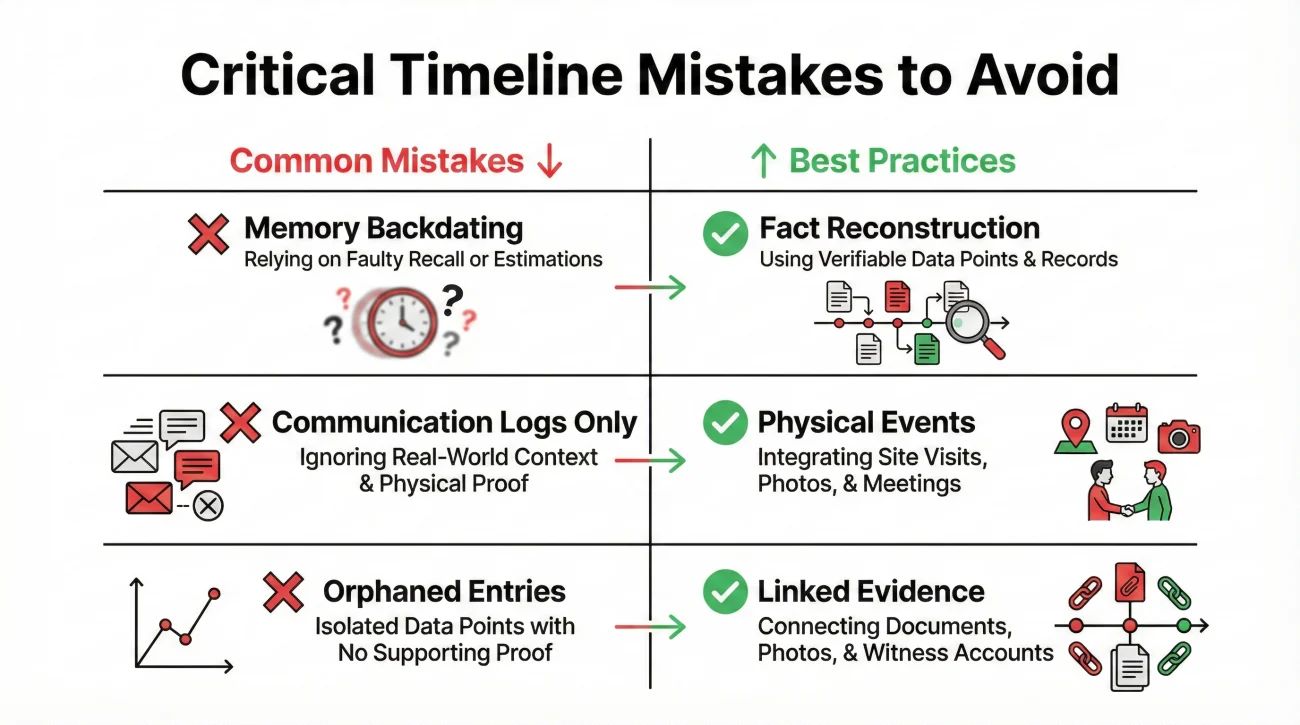
The Memory Backdating Trap
The most common mistake is waiting two weeks to start the log and trying to recreate the dates from memory. Human memory is notoriously unreliable under stress. You might write down that the water extraction happened on a Tuesday, when it actually happened on a Wednesday. If your written log contradicts the dates on your contractor invoices, it creates unnecessary friction and prompts further investigation.
If you forgot to log the first seven days, do not panic and do not guess. Rebuild the timeline using invoice dates, text message timestamps, and contractor work orders. Mark these entries with a note like “date reconstructed from receipt” to maintain trust. It is always better to reconstruct accurately using data than to backdate from an unreliable memory.
Logging Conversations Instead of Physical Events
Another frequent error is treating the evidence timeline log like a communication diary. People will write entries like “Called the front office and left a message.” While tracking communication is vital, it belongs in a separate system. Your evidence timeline log should be strictly reserved for physical events regarding the property.
Tracks who you spoke to, phone calls, portal messages, and requests for updates.
Tracks physical events on the property (water found, tarp placed, drywall removed). Keep these separate.
Mixing conversations with physical events clutters the document and makes it harder for a reviewer to quickly grasp the physical history of the property.
Orphaned Entries
An orphaned entry is an action on your timeline that has no corresponding proof in the reference column. For example, logging “Threw away ruined mattress” without referencing a photograph of the ruined mattress. If an item leaves the property, the timeline entry must point to the evidence showing the item’s condition before it was removed.
Connecting the Log to Your Complete Evidence Strategy
Your timeline log is incredibly powerful, but it does not exist in isolation. Think of the timeline log as the index of a book, while your photos, videos, and receipts are the actual pages. For the index to work, it has to point to a well organized set of files.
Every time you write “Photos 10-15” in your log, those photos must be clearly labeled and stored safely. If your digital files are a chaotic mess, the timeline log loses its value. You must maintain strong file hygiene alongside your log to ensure unmapped photos do not cause delays.
To make sure your timeline connects flawlessly to your visual proof, you should integrate it directly with a broader structural approach. If you are unsure how to organize the underlying files that this timeline points to, I highly recommend building a complete property claim evidence pack. A proper evidence pack ensures that when a reviewer reads your timeline and asks for “Photo 12,” you can produce it instantly.
The Update Protocol: Establishing a Daily Habit
A timeline log is only useful if it is accurate and up to date. During the active phases of your situation, specifically the first few weeks when mitigation and temporary repairs are occurring, you need a consistent update habit.
I advise setting aside a few minutes to capture timestamps quickly, then consolidate them once a day. Treat it as a simple daily habit rather than a forced chore.
Your daily update routine should follow a simple flow:
[Review today's physical actions] + [Verify supporting photos exist] + [Add short entry to log]
If nothing happened on the property that day, you do not need to make an entry. The log only tracks changes and actions. However, if a contractor dropped off materials, or if you discovered a new area of moisture, that requires an immediate entry. By doing this daily, the timeline builds itself naturally, and you never have to face the overwhelming task of remembering a week’s worth of chaotic events.
💡 Pro Tip: Keep a notepad on the kitchen counter or use a dedicated note app on your phone. Jot down the time whenever something physical happens, then transfer it to your master log at night. This ensures you never lose a timestamp.
Final Thoughts on the Timeline Log
Documenting a damaged property is exhausting, and it is tempting to skip administrative tasks like keeping a written timeline. However, skipping this step often leads to significant delays down the line. When reviewers cannot understand the sequence of events, their default response is to pause the review and ask for clarification. Every time that happens, the process stalls.
By investing just a few minutes a day into maintaining your evidence timeline log, you are taking control of the narrative. You are replacing confusion with clarity. You are showing that you are organized, attentive, and serious about providing accurate information. Keep the log simple, focus purely on the facts, and always link your entries to your physical evidence. This simple document is one of the most effective tools you can build to keep your documentation moving forward without unnecessary friction.
❓ FAQ
⏱️ How often should I update my evidence timeline log?
Update it daily during the active phases of discovery, cleanup, and temporary repairs. Once the property is stabilized and physical changes stop, you only need to update it when a new physical event occurs, like a contractor arriving for an inspection.
📱 Does photo metadata replace the need for a written log?
No. Digital metadata can be easily changed or removed when photos are compressed, emailed, or uploaded to online portals. A written log provides a stable, permanent index that cannot be accidentally erased by software.
📝 Should I include phone calls and emails in this specific log?
No. Your evidence timeline log should focus exclusively on physical events at the property, such as when damage was found, when items were moved, or when repairs began. Keep a separate log for all communications.
🛠️ How do I log temporary repairs done by a contractor?
Log the exact date and time they arrived, briefly state the action (e.g., “Contractor installed emergency roof tarp”), and use the reference column to list the before and after photos as well as the contractor’s invoice number.
🗓️ What if I forgot to log something on the exact day it happened?
Do not guess. Look at your text messages, emails, or credit card receipts to verify the correct date, then add it to the log. You can add a note stating the date was reconstructed from receipts to maintain transparency.
📸 How do I tie a specific photo to a timeline entry?
In the “Evidence Reference” column of your log, write down the exact file name or number of the photo. Ensure your actual photo files are labeled to match what you wrote in the log.
🗑️ Should I log when debris is removed from the property?
Yes. The removal of debris changes the physical condition of the property. Log the date it was removed and always reference the photos you took of the debris before it was thrown away.
🖊️ Is it better to keep this log on paper or digitally?
A digital spreadsheet is often easier to read, update, and share cleanly, but a physical notebook is perfectly fine if it is neat. The consistency of the information is far more important than the medium you choose.
🔍 What details are considered too much for a timeline entry?
Avoid emotional language, theories about what caused the damage, or long paragraphs of explanation. Keep it to one concise sentence stating what physical action occurred at what time.
☔ How do I log ongoing damage, like a leak that lasts for days?
Log the initial discovery, then create new entries only when the situation measurably changes. For example, log when the leak expands to a new room, or log the specific time you place a new bucket to catch the water.
⚠️ Disclaimer: PropertyClaimChecklist.com provides practical guidance, process checklists, and example follow-ups to help you organize a property claim and move it forward. It is not policy language, claim documentation, legal content, or a substitute for your insurer's instructions. Always rely on your carrier's requirements and your actual policy terms for what must be submitted and how decisions are made.