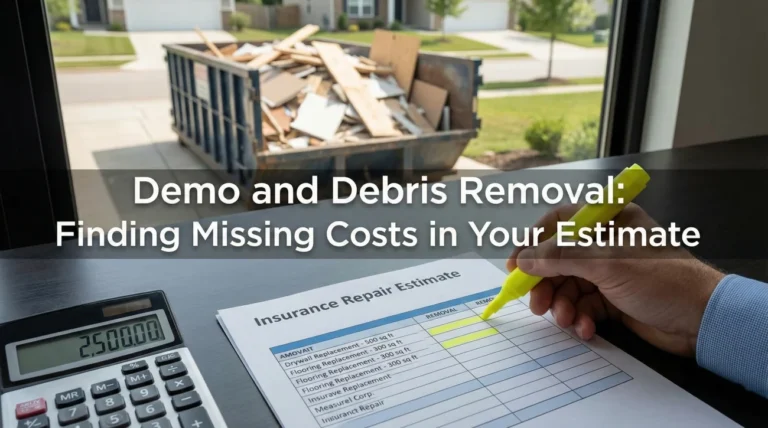
- Reviewers cannot approve a higher final invoice based on price alone; you must categorize the difference as specific changes in the physical scope of work.
- Always separate your contractor’s final bill into clear “Delta Categories” such as hidden damage, code upgrades, or missing detach-and-reset operations.
- A higher final invoice is often ineffective without a supporting evidence pack, which should include mid-repair photos, official documents, and a clear mapping to the original estimate line items.
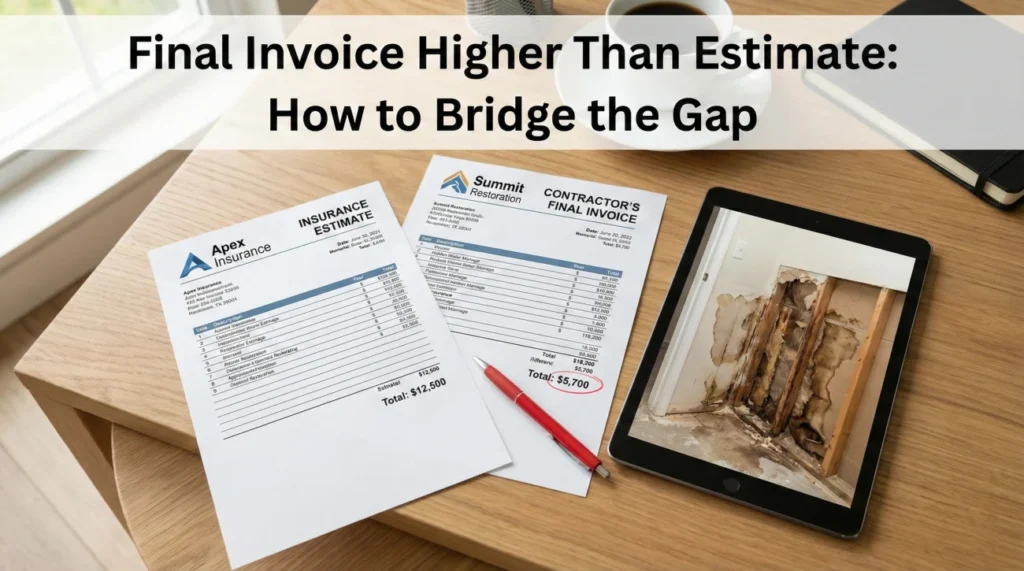
Facing the Gap Between the Estimate and the Final Bill
You have made it through the repair process, the dust is finally settling, and your contractor hands you the final invoice. You look at the total, and your stomach drops. The final number is significantly higher than the amount approved in your initial insurance paperwork. When a final invoice higher than insurance estimate totals lands on your desk, the immediate reaction is often panic or frustration. You might wonder how you are going to cover the difference or if the system has somehow failed you.
In my experience handling daily claims operations, this is one of the most common bottlenecks in the entire process. I see it constantly: a project wraps up, the contractor’s final bill exceeds the initial estimate by several thousand dollars, and the file immediately grinds to a halt. The instinct for many people is to simply forward that final invoice straight to the desk reviewer, assuming the higher number speaks for itself. It rarely does.
When you are operating on the documentation side of a property claim, you have to understand how the person reviewing your file thinks. They are not looking at your repaired house; they are looking at a screen. They cannot approve a higher payment just because a contractor charged more. They need a documented, justifiable reason for the difference. The initial estimate was built on a specific set of assumptions and visible damage at a specific point in time. If the final bill is higher, it means those assumptions changed. Your job is not to argue about the final price tag; your job is to organize the proof of exactly what changed in the physical scope of work to justify that price.
In this guide, I will walk you through the operational framework for managing a final invoice discrepancy. We will focus entirely on categorizing the differences, building the right documentation pack, and presenting the facts so clearly that a reviewer can quickly understand exactly why the final cost outpaced the initial scope.
The “Delta” Concept: Framing Differences as Scope, Not Price
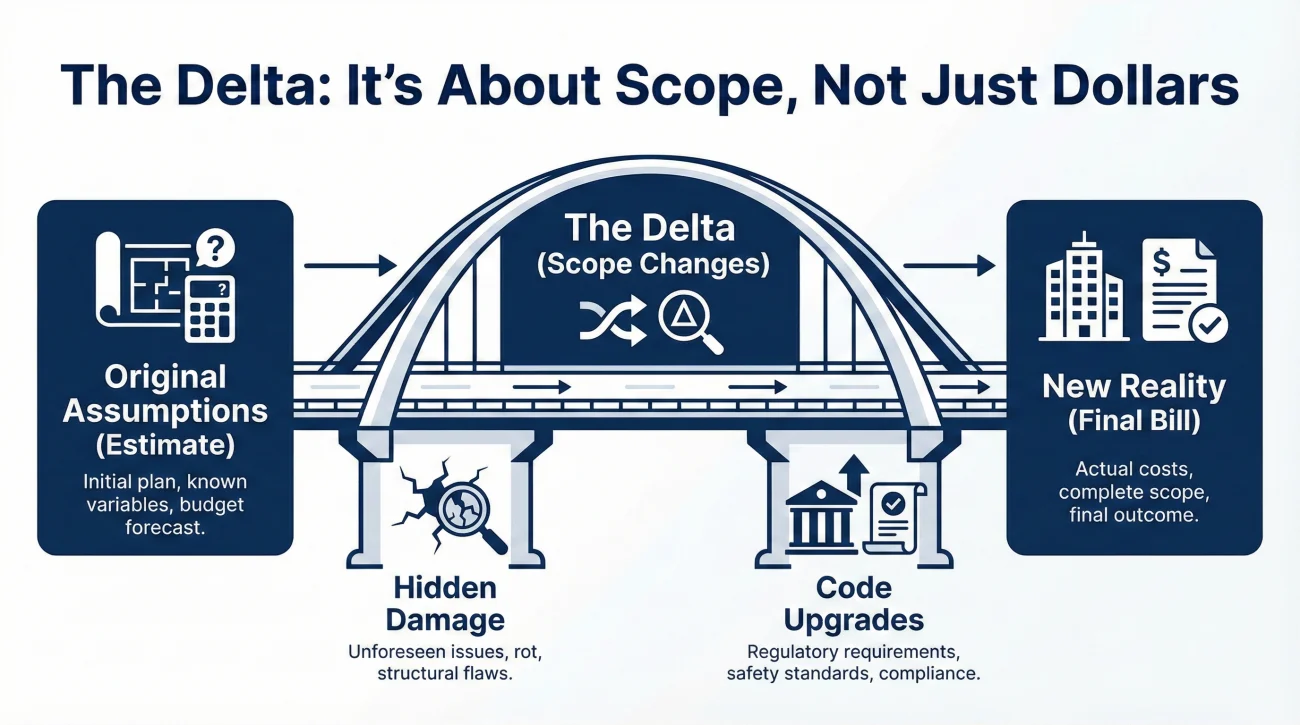
To successfully navigate a higher final invoice, you need to shift your mindset. Stop thinking about the difference in dollars and start thinking about the difference in actions. In claims operations, we often refer to the difference between the approved estimate and the final invoice as the “Delta.”
A Delta is simply the gap between what was originally assumed and what actually happened. When a file lands on my desk with a higher final bill, the first thing I look for is an explanation of the Delta. If the explanation is just “materials cost more,” the file is likely going to stall. However, if the explanation is “we had to remove an additional 100 square feet of flooring due to water migration discovered under the baseboards,” we now have a physical change in scope that can be reviewed, verified, and potentially approved.
📌 Note: Never submit a final invoice with a vague note saying “the contractor charged more than expected.” Reviewers are bound by guidelines and need specific line-item justifications. A price difference is the result of a scope difference. Always focus on proving the scope.
Consider the daily reality of the desk reviewer. They have an initial estimate that outlines, for example, 50 square feet of drywall replacement. Your final invoice bills for 150 square feet. If you do not explain why that extra 100 square feet was removed, the reviewer has no operational basis to approve it. They cannot assume hidden damage existed; you have to prove it. The Delta is the bridge between the old assumptions and the new reality.
Forwarding a higher invoice with the subject line “Final Bill – Please Pay Difference” and zero explanation.
Submitting the final invoice alongside a structured list categorized by “Hidden Damage Discovered” and “Required Code Upgrades,” backed by mid-repair photos.
Categorizing the Scope Differences (The Delta Categories)
When you receive a final invoice that exceeds the estimate, your first operational step is to sit down with that invoice and the original estimate. You must map every dollar of difference to a specific category. This organized approach takes the emotion out of the higher bill and turns it into a factual, line-by-line review.
In most property recovery scenarios, the differences will fall neatly into one of a few common operational categories. Categorizing the Delta makes it infinitely easier for a reviewer to process your request because they can route the different categories through their respective approval channels.
| Delta Category | What it Means in Practice |
|---|---|
| Hidden Damage | Damage that was impossible to see during the initial inspection but was revealed during tear-out (e.g., rot behind cabinets, moisture under a subfloor). |
| Code Upgrades | Changes mandated by local building authorities that require bringing older structures up to current safety or building codes. |
| Missing Detach & Reset | Items that had to be carefully removed and reinstalled to access the damage, which were omitted from the initial scope (e.g., moving an appliance to replace the floor beneath it). |
| Material Unavailability | The originally estimated “like-kind” material is officially discontinued, requiring an upgrade or alternative material choice. |
💡 Pro Tip: The Delta Mapping Sheet
To make the reviewer’s job as easy as possible, I recommend creating a simple 6-column spreadsheet to serve as the cover page for your invoice: Estimate Line Item | Final Invoice Line | Delta Category | Description of Scope Change | Evidence File Name | Dollar Amount. This single document translates the contractor’s bill into the reviewer’s operational language.
Category 1: Hidden Damage Discovered During Tear-Out
This is arguably the most common reason a final invoice comes in high. Initial estimates are inherently limited because they are based on visual, non-destructive inspections. No one has X-ray vision. When the contractor starts removing damaged drywall, flooring, or roofing, they frequently uncover secondary issues.
If your Delta is due to hidden damage, you must clearly identify what was found, when it was found, and what specific actions were required to address it. Did the plumber find a secondary leak point in the wall cavity? Did the flooring crew find that the subfloor had compromised structural integrity? Group these items together under a “Hidden Damage” header when you present your documentation.
Category 2: Code Upgrades Required by the Municipality
Building codes change constantly. An electrical panel or framing technique that was perfectly legal twenty years ago may not meet today’s standards. When a contractor pulls a permit for the repair work, the local inspector may mandate that certain systems be brought up to current code before they will sign off on the project.
These upgrades can be expensive and are almost never included in an initial estimate because the adjuster cannot predict what a local inspector will demand. If your Delta involves code compliance, it must be separated from general repair costs. These are often evaluated under specific “Ordinance and Law” coverages, depending on your specific policy provisions and endorsements, which require a different set of internal approvals.
Category 3: Missing Detach and Reset Operations
In the claims industry, we call this “D&R” (Detach and Reset). It refers to undamaged items that must be moved out of the way to facilitate a repair. A classic example is a toilet. If the bathroom floor is being replaced, the toilet must be detached, moved, and then reset with a new wax ring once the floor is done.
Initial estimates frequently miss the labor hours required for D&R. If a contractor had to unhook and move a washer, dryer, refrigerator, or complex custom shelving unit to execute the approved repairs, the labor to do so is a valid scope addition. Categorizing these omissions helps reviewers quickly see that the contractor isn’t overcharging for the floor repair, but rather billing for the necessary prep work.
Category 4: Material Unavailability
Sometimes, the exact “like-kind” material approved in the estimate is officially discontinued. This typically presents in two ways: either you need a slightly more expensive exact match from a different product line, or you are forced into a full replacement because a partial repair is no longer possible (like roofing shingles that no longer interlock safely). If your Delta is driven by discontinued materials, you must document the exact reason the original material could not be sourced, rather than just submitting the higher receipt.
Key Point: By categorizing the differences into specific buckets like ‘Hidden Damage’ or ‘Code Upgrades,’ you transform a confusingly high invoice into a structured, verifiable list of operational facts.
Building the Supporting Documentation List
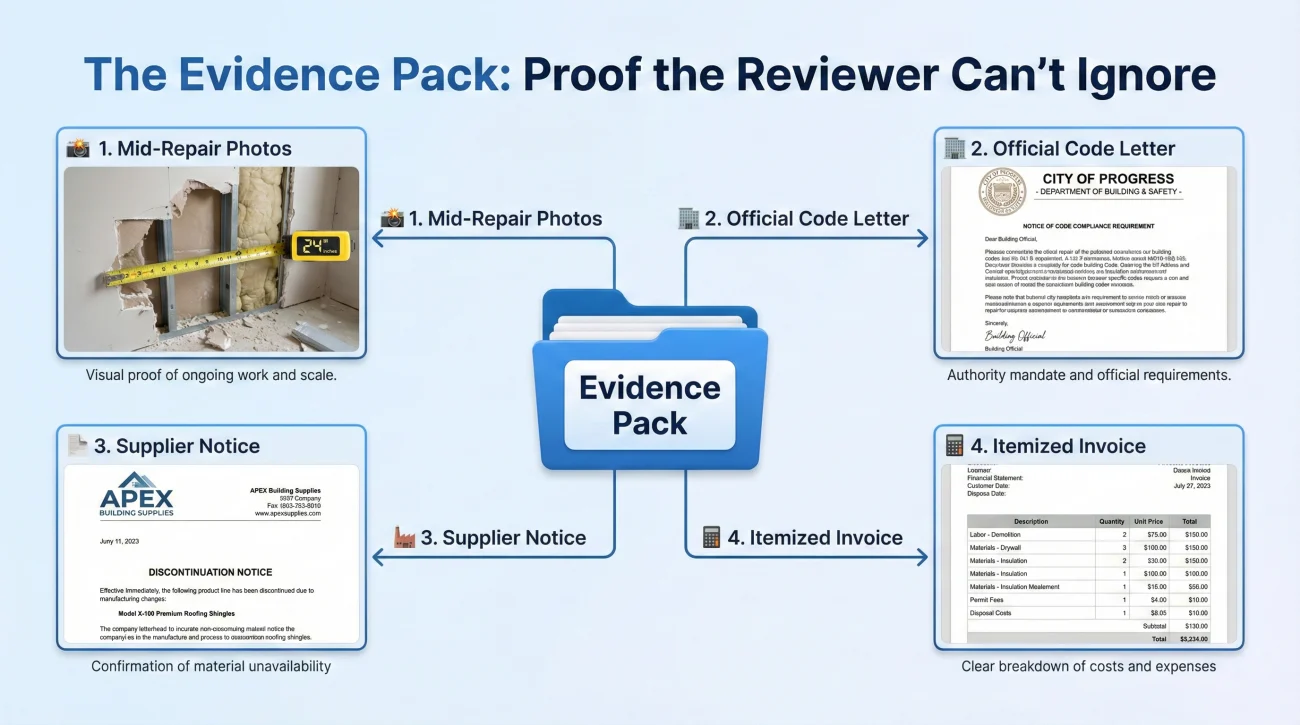
Categorizing the Delta is only half the battle. The other half is proving it. I cannot overstate this: a desk reviewer will typically struggle to approve a scope change based purely on your word or the contractor’s invoice description. They need a trail of evidence. If you tell them there was rot in the subfloor, they need to see the rot.
If you are actively organizing your files and putting together a comprehensive low estimate documentation response, this is where your evidence gathering pays off. You need to build a supporting documentation list that directly answers every question the reviewer might have about your Delta categories.
Mid-Repair Photographic Evidence
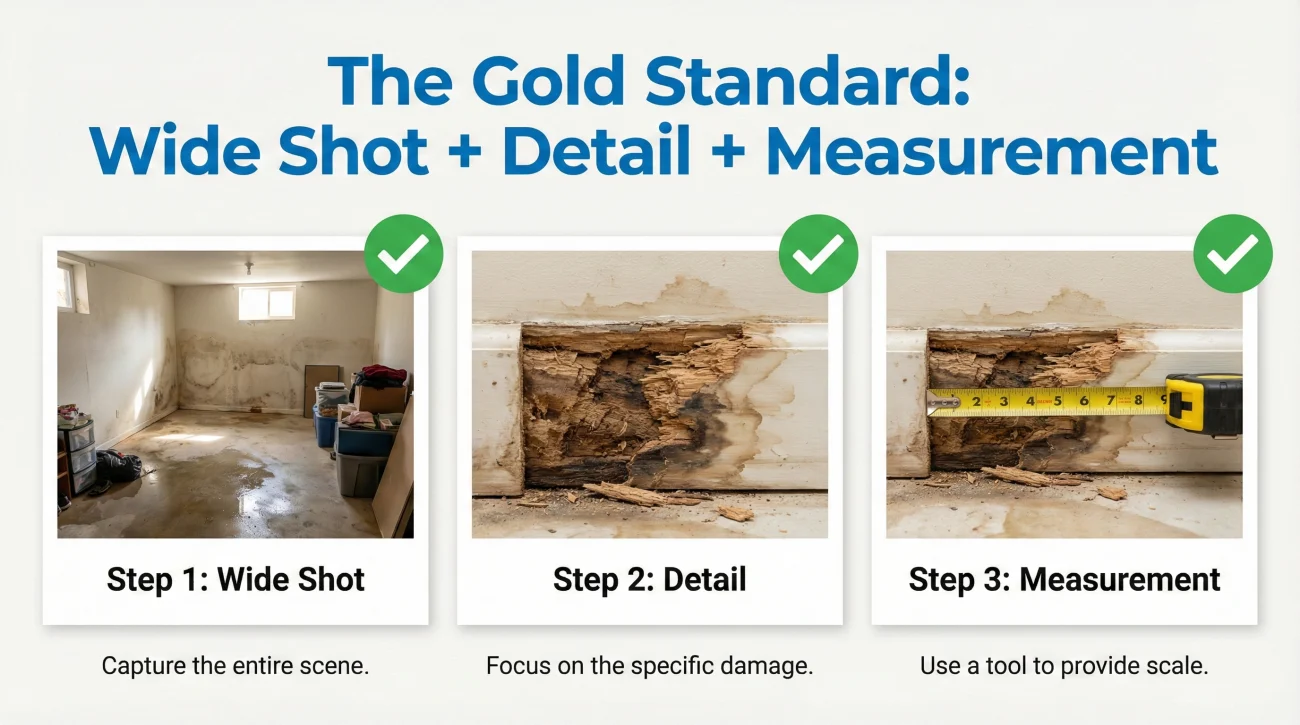
This is the gold standard for proving hidden damage. When a contractor uncovers an issue that was not on the initial estimate, they must stop and take clear, well-lit photos before they tear it out or cover it up. I have seen hundreds of claims delayed simply because a contractor fixed a hidden issue and threw the damaged material in the dumpster before taking a picture.
- 📸 Context Shots: A photo of the entire room to show the location of the newly discovered damage.
- 📸 Detail Shots: Close-up photos clearly showing the rot, mold, broken pipe, or structural failure.
- 📸 Measurement Shots: Photos with a tape measure held up to the damaged area to prove the exact dimensions of the newly required repair.
Ensure the photos have digital timestamps enabled. If digital timestamps are not possible, email the photos to yourself the same day they are taken to establish a verifiable timeline, or ask your contractor to include a date-stamped job log with their invoice.
Official Code Enforcement Documentation
If your final invoice is higher due to code upgrades, photos will not be enough. A reviewer needs official documentation from the governing municipality to prove that the upgrade was a legal requirement, not just an optional improvement recommended by the contractor.
You should gather the official permit documents, any written notices or inspection failure reports from the city inspector, and a copy of the specific municipal code section that is being enforced. When you provide the exact code text alongside the city inspector’s requirement, you remove all ambiguity. The reviewer can see clearly that you had no choice but to incur the extra cost.
Supplier Discontinuation Notices
If the initial estimate assumed a partial repair with available materials, but the contractor had to upgrade to a different product line or replace the entire surface because a match was impossible, you must document the unavailability.
A note from your contractor saying “we couldn’t find it” is rarely sufficient. You need written documentation, ideally on company letterhead, from a major regional supplier or the manufacturer itself stating exactly what you are requesting: confirmation that the specific model, color, or material line has been officially discontinued and is no longer available in your supply chain.
Field Notes: Translating Scope Changes into Approvals
Let’s look at how this plays out operationally across two very common scenarios.
Field Note 1: The Subfloor Scenario
I frequently review files where the original estimate accounts for replacing water-damaged hardwood flooring in a living room. That is all the field inspector could see: cupped hardwood. However, when the contractor removes the hardwood, they discover severe rot in the plywood subfloor underneath.
The contractor cuts out the rotten subfloor, installs new plywood, and the final invoice arrives $1,500 higher than the estimate.
Here is a common pattern I see where files go missing or get endlessly delayed: The homeowner forwards the invoice. The reviewer sees “Subfloor replacement – $1,500.” The reviewer looks at the initial estimate, sees no mention of a subfloor, and marks the file as “Unauthorized Scope Increase.” The payment is held back.
Field Note 2: The Missing Detach & Reset Scenario
Another common gap involves Detach and Reset (D&R) operations. In a recent file, the estimate covered replacing drywall behind a custom bathroom vanity, but omitted the labor to carefully detach, move, and reinstall the vanity itself. The final invoice included an extra $600 for this D&R work.
If the homeowner just passed the bill along, the reviewer might assume the contractor is padding the labor rate. Instead, the homeowner categorized this as “Missing Detach & Reset” and provided pre-tear-out photos showing the vanity obstructing the damaged wall. This proved the operational necessity of the labor, and the reviewer easily matched the photo to the invoice line item.
To avoid delays in either scenario, create a simple transmittal document. You do not argue about the price; you present the physical facts of the repair.
Subject: Final Invoice transmittal and scope difference documentation
Hello [Name],
Attached is the final contractor invoice for the completed repairs. You will note the final total reflects a scope difference from the original estimate. I have categorized the differences below and attached the supporting evidence for your file:
1. Hidden Damage (Subfloor): During the removal of the approved hardwood flooring, severe rot was discovered in the underlying subfloor. The contractor had to remove and replace 64 square feet of 3/4 inch plywood.
– Evidence Attached: Mid-repair photos showing the rotted subfloor with a tape measure indicating the dimensions.
2. Missing Detach & Reset (Bathroom Vanity): The initial estimate omitted the labor to detach and reset the custom vanity required to install the new drywall behind it.
– Evidence Attached: Pre-repair photos showing the vanity placement against the damaged wall.
Please review the attached invoice and photo log, and let me know if you need any further technical documentation to process the file.
Common Mistakes When Submitting Final Invoices
Even with the right documents, the way you assemble and submit your final package can either speed up the review or cause unnecessary delays. Throughout my time auditing file communications, I have identified several critical mistakes people make at the finish line.
Mistake 1: Lumping Costs Together
One of the worst things a contractor can do on a final invoice is submit a single, lump-sum total like “General Repairs: $15,000.” If the original estimate was detailed out line-by-line, the final invoice must follow a similar logical structure. If a reviewer cannot see exactly how much the hidden subfloor repair cost versus the code-required electrical upgrade, they cannot process the file. Ensure your contractor breaks the invoice down so the specific Deltas are isolated and easily readable.
Mistake 2: Missing Context on Mid-Repair Photos
I cannot tell you how many times I have opened a file to find thirty close-up photos of blurry wood grain. If a photo is taken too close to the damage, the reviewer cannot tell what room they are looking at, let alone what house it is. Every mid-repair photo set must start with a wide-angle shot of the room to establish location, followed by the detailed close-ups.
⚠️ Warning: Do not let your contractor throw away the damaged materials until the mid-repair photos have been taken, reviewed, and securely saved to your claim folder. Once the evidence is in the landfill, it is incredibly difficult to prove the scope change existed.
Mistake 3: Arguing Labor Rates Instead of Scope
Often, a final bill is higher simply because the contractor charges a higher hourly rate than the software used to generate the initial estimate. While labor rate discrepancies are a real issue, they are a completely different operational conversation than scope differences. If you mix an argument about “the contractor charges more per hour” with “we found hidden damage,” the water becomes muddy. Always separate the two. Prove the physical scope changes (the Deltas) first with your documentation pack. Once the scope is fully agreed upon, any remaining mathematical differences regarding local market rates can be addressed separately.
The “One Email” Submission Checklist
When you are ready to submit, do not send files across multiple emails. Package everything into one clean transmission to prevent items from getting lost in the reviewer’s inbox:
- ✅ The final contractor invoice (itemized).
- ✅ Your Delta Mapping Sheet (or categorized breakdown in the email body).
- ✅ The photo log (context and close-up shots).
- ✅ Official municipality documents (if claiming code upgrades).
- ✅ Supplier discontinuation notices (if claiming material changes).
- ✅ A polite request to “please confirm receipt of these documents for the file.”
Final
A final invoice that comes in higher than the initial estimate is not necessarily a crisis; it is simply a reality of complex property repairs. Initial inspections cannot account for what is hidden behind walls or beneath floors, and they certainly cannot predict the exact requirements of a local city inspector.
The key to resolving the difference lies entirely in your operational discipline. Keep your communication factual, maintain a clean paper trail, and always present your categorized proof alongside the final bill. When you categorize the differences and back them up with a rigorously organized file, you give the reviewer exactly what they need to do their job efficiently.
❓ FAQ
🛠️ Why is my final contractor invoice higher than the insurance estimate?
Final invoices are typically higher because contractors discover hidden damage during tear-out, encounter required municipal code upgrades, or perform necessary detach-and-reset tasks that were not visible or accounted for during the initial visual inspection.
📱 Can I just email the higher invoice to my adjuster?
Simply forwarding the invoice is rarely effective. You should always accompany a higher invoice with a breakdown of exactly what physical scope changed (the Delta) and attach the supporting evidence, such as mid-repair photos or code documents.
📸 What proof do I need if the contractor found hidden damage?
The most critical proof is mid-repair photographic evidence. You need clear, wide-angle context shots of the room, detailed close-ups of the newly discovered damage, and photos showing measurements of the affected area before it is repaired or covered up.
🏗️ Does insurance cover building code upgrades found during repair?
This depends on your specific coverage, but operationally, to even be considered for approval, you must provide official documentation from the municipality (like an inspection failure report or permit requirement) proving the upgrade was legally mandated.
📄 How do I show that an item was missing from the original scope?
You must compare the contractor’s itemized invoice against the original estimate line by line. Highlight the specific tasks (like moving appliances or specialized prep work) that the contractor had to perform but were absent from the initial paperwork.
📆 Is there a time limit to submit a final invoice difference?
Timelines vary greatly depending on the situation. Your best operational step is to request a written checklist of deadlines from the reviewer early in the process and log your submissions promptly as soon as the final invoice is generated.
📝 What if my contractor’s line items don’t match the insurance estimate?
If the formatting differs, you should ask your contractor to categorize their higher costs into clear buckets (e.g., Hidden Damage, Material Upgrades) so the desk reviewer can easily map the changes back to the original scope.
🔎 How do reviewers check a final invoice for accuracy?
Reviewers compare the new invoice against the original estimate’s assumptions. They look for documented justification—like photos, measurements, and municipal letters—to verify that the requested scope increase is a physical reality.
📦 What documentation is needed if original materials are no longer available?
You need a formal, written notice on company letterhead from a major regional supplier or the manufacturer stating that the specific material, model, or color has been officially discontinued and cannot be sourced.
✉️ Should I ask my contractor to write an explanation for the higher bill?
Yes. Having the contractor provide a clear, factual written breakdown of the physical tasks that changed during the build is highly effective, as long as they focus on the scope of work rather than simply arguing about pricing algorithms.
⚠️ Disclaimer: PropertyClaimChecklist.com provides practical guidance, process checklists, and example follow-ups to help you organize a property claim and move it forward. It is not policy language, claim documentation, legal content, or a substitute for your insurer's instructions. Always rely on your carrier's requirements and your actual policy terms for what must be submitted and how decisions are made.